Baking · Desserts · Europe · Nation Cake Challenge · Pastry · Uncategorized

Montenegro: Krempita

montenegro-flag-167-pWhen visiting Dubrovnik, one of the excursions that we made was to have a day tour of Montenegro (or at least such parts as can be reached in the course of one day!). For us, the main parts of this focused on the cities (towns?) of Kotor and Budva. Now besides having an extremely delicious bowl of mussels and an extremely entertaining and informative tour guide (who would divert from the standard tour guide spiel with anecdotes about subjects ranging from James Bond to Roman Abramovich’s yacht – complete with two helipads AND two submarines!), one of my aims was to find some Montenegrin cake, and to actually see what they sell in the local bakeries. This delectable delight was one of those treats found. Whilst I didn’t try it on that trip (squishy vanilla slice on long coach trip -bad idea!), I decided that I definitely wanted to try the recipe at home.

DSC_0002

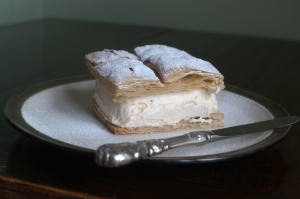
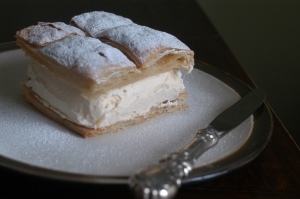
Krempita is essentially a vanilla custard slice, made with 2 layers of puff pastry sandwiched with a thick vanilla custard-cream. I used puff pastry leftover from making allumettes, but this will work perfectly well with ready-made pastry – don’t try and make life life two difficult if you don’t want to! If on the other hand you do want to have a go at making your own, check out the recipe from here.

DSC_0005

Ingredients:

  • 2 sheets of puff pastry
  • 6 large egg yolks
  • 6 tablespoons sugar
  • 2 tablespoons cornflour
  • 1 1/2 cups milk
  • 2 packages unflavored gelatin
  • 32floz/950ml double cream whipped with 2 tablespoons vanilla sugar
  • Icing sugar

Preparation:

Heat oven to 400°F/200°C/Gas Mark 6. Roll out each piece of puff pastry slightly  and score into 9 sections. Sandwich each puff pastry sheet between two pieces of parchment paper and two cooling racks, to keep it flat but stillcrispy. Bake for 15 minutes, before removing the top rack and top sheet of parchment paper. Replace rack and continue to bake until golden and crispy throughout, before leaving to cool completely.

Whip the egg yolks and sugar until thick and lemon colored before adding the cornflour and milk and mixing thoroughly. Transfer to a bain-marie and coook gently until the custard thickens, stirring constantly. Remove from the heat. Dissolve gelatin completely in 1/2 cup cold water and stir into the hot custard until completely dissolved.

Cool the custard in an ice bath, stirring occasionally. If, for some reason, the custard has lumps (from being cooked at too high a temperature or undissolved gelatin), strain it through a sieve.

When the custard is cool and very thick but not yet set, fold in the sweetened whipped cream. Layer over 1 sheet of baked puff pastry and top with second sheet. Refrigerate at least 1 hour before eating. Cut into rectangles and dust with icing sugar before serving.

When visiting

Baking · Europe · Nation Cake Challenge · Pastry

France: Puff Pastry and Allumettes

Flag of France

Now as a home baker, there are some recipes that most people agree are just not worth trying, either through difficulty or through the ability to get ready-made equivalents very easily. Unfortunately, those type of recipes bring out my competitive spirit, and my ‘I-can-do-that’ mood. It was this mood that has led to the latest endeavor – making puff pastry.

I know, why? Is it really worth it when you can buy a perfectly acceptable version very easily? I think it’s a bucket-list type thing – it’s nice to be able to say you can do it, even if you don’t for the majority of the time! The timing was perfect – I had just been invited to take part in the Our Growing Edge event by Genie at Bunny Eats Design (hosted his month by Sonya at And More Food), and was looking for something appropriate – voilà! 

our-growing-edge-badge

Recently I gained my Masters degree from Cambridge and as a gift was given an Amazon voucher, the gift of everything! If, as Bill Bailey says, the Argos catalogue is the ‘laminated book of dreams’, then Amazon must be the digital equivalent – they sell everything! As a baking geek though my choice was the Foundation Recipes book from Le Cordon Bleu – probably the closest I’ll get to actually going there! (though a girl can dream!) The logical thing to do then was to start at the beginning, which was – you guessed it – puff pastry! Whilst very time consuming, it turned out well, and the allumettes given here proved very popular with Max (who is by now getting used to coming home to many different baked goods to try!)

DSC_0005

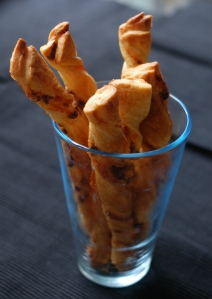
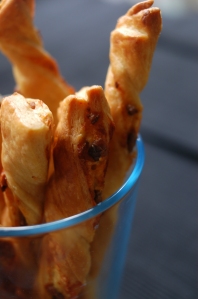
Allumettes are made from anchovies and Gruyere cheese sandwiched in between two layers of puff pastry. Now to be completely honest, the cheese in these is not Gruyere, but Cheddar – I had it in the fridge and I could only buy a massive block of Gruyere which might have ended up going to waste. However, Cheddar works well and you can take your pick when making them – the recipe is the same.

DSC_0010

I have included the recipe for puff pastry here, but if you don’t want to make it, then follow the final steps with ready-made pastry.

Allumettes

Ingredients:

  • 8oz/250g plain flour (sifted)
  • 1/4oz/5g salt
  • 3 1/2floz/100ml cold water
  • 7oz/200g butter
  • 4-6 anchovy fillets
  • 1 egg (for eggwash)
  • 3 1/2oz/100g Cheddar cheese (or Gruyere, depending on you budget!)

Instructions:

Set out a silicon baking mat on the work surface and lightly dust with flour. Sift the flour onto the work surface and make a well in the centre. Add the salt and water (carefully, ensuring the water doesn’t run all over you, like it did to me!) and mix together with your fingers. Add half the butter and incorporate using your fingers, until the mixture forms a coarse dough (I ended up almost kneading it – probably not conventional, but it did the job!) Shape it into a ball, cut a large cross in the top and refrigerate in a plastic bag overnight.

The next morning, place the remaining 100g of butter between 2 sheets of baking paper, and hit with a rolling pin until flat, before forming into a square about 1cm thick. Remove the puff pastry from the fridge and on a lightly floured surface roll the pastry into a cross shape, using the cuts as a guide. The centre of the cross should be thicker than the outer arms in order to make a good pastry. Place the square of dough in the centre and fold the two side arms over the butter. Turn by 90 degrees and repeat with the other two arms of the cross. Press the seams well to seal and tap with the rolling pin (just to make sure!)

Roll out the dough to a rectangle three times the length of the original and about 1cm thick. Fold the bottom third up and then the top third down, making sure the edges are even. Rotate by 90 degrees ( a quarter turn), and roll out and fold as before. Turn once more, place twofinger marks in the top left hand corner and place in the fridge for 20 minutes.

Remove from the fridge and place with the indents in the top left hand corner. Repeat the previous fold and roll sequence another two times before marking with four imprints (as before) and refrigerating for 20 minutes. Remove and repeat the process once more before placing back in the fridge for a final chill.

Finely chop the anchovies and mix with the grated cheese. Roll the pastry into a large rectangle and cut in half, brushing one half with the egg wash. Spread with the cheese and anchovy mixture, before topping with the second half of the pastry. Cut into strips and taking each end of the strip, twist three times before placing on a lined baking sheet.Brush with eggwash before baking in an oven preheated to  425°F/220°C/Gas mark 7 for 20 minutes until golden brown. Remove from the oven and leave to cool.

Baking · Cake · Europe · Nation Cake Challenge

Monaco: Grand Prix Billionnaires Shortbread

Flag of Monaco

Ah, Monaco. Just the name of it is enough to conjour up images of riches from gigantic houses and yachts to the pictures of the rich and famous. It is one of the richest countries on earth, has the highest number of millionnaires/billionaires per capita, and the district of Monte Carlo was described by the Encyclopedia Brittanica as an

“international byword for the extravagant display and reckless dispersal of wealth”

Grace Kelly became a Monasque citizen after marrying Prince Rainer III of Monaco in 1956. She was styled as ‘Her Serene Highness’ from this point – a title which I think is lovely, and am thinking of adopting for myself (assuming I can remember to be serene!) In a slightly less impressive way, Monaco’s refusal to levy income tax on most of its citizens means that many rich Europeans gain Monasque citizenship to take advantage of this, thus again increasing the sheer amount of million/billionaires in one country.

Wedding dress of Grace Kelly

However today a very exciting event is taking place – The Monaco Grand Prix! Arguably the most famous and prestigious motor race in the world, it forms a third of the Triple Crown of Motor Sport (also including the Indianapolis 5000 and the 24 Hours of Le Mans) and is extremely popular in the principality. Many of the drivers own property there and the race has been described as adding

” a location of exceptional glamour and prestige”

Looking at the picture below, you can only agree.

View of Monaco

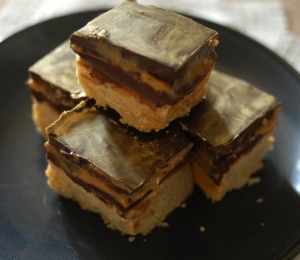
Anyway, back to the race. I am a massive Formula 1 fan, and so later today I will be sat on the sofa cheering on Mr Kimi Raikkonnen who is my main championship hope for this season. (I also have a soft spot for Mark Webber and Jensen Button, but I have my – metaphorical – money on Raikkonnen!) Whilst I watching the race I will be eating some of this scrumptious delight, which is my Monaco-Grand-Prix-Billionnaires Shortbread.

DSC_0017

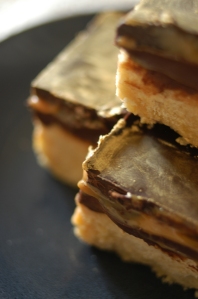
Now you might have heard of the Millionaires shortbread which features a layer of shortbread, topped with caramel and chocolate. There is actually a level up – the Billionnaires shortbread which includes a layer of peanut butter as well. I do not get this – a ridiculously extravagant, luxurious dessert and you go and put peanut butter in it? No thank you! This is my version which includes a layer of champagne-flavoured chocolate ganache under the caramel. So much more extravagant and delicious!

DSC_0014

So go to the TV/Radio/Internet and watch the race. Imagine yourself in very expensive sunglasses, sitting on a yacht in the sunshine. And when it’s over and reality hits, make this and live the dream.

Monaco-Grand-Prix-Billionaires Shortbread

Ingredients:

  • 150g butter
  • 65g caster sugar
  • 210g plain flour
  • a pinch of salt

Caramel Topping (Don’t use tinned whatever you do – it doesn’t work!)

  • 50g butter
  • 50g soft brown sugar
  • 400g condensed milk

Champagne-Chocolate Ganache:

  • 100g plain chocolate
  • 70g double cream
  • 2 tbsp champagne

Topping:

  • 100g plain chocolate
  • Edible gold lustre (optional)

Instructions:

This dish is made in several stages, but a lot of the preparation is layering up the dessert and then leaving it to chill in the fridge (so not too much hassle!) First make the shortbread. Cream together the butter and sugar before mixing in the flour and salt in two halves. Press the mixture into a lined square cake tin and prick with a fork – this doesn’t have to be too neat as it will be covered later, juts try to make it as even as possible. Place this in the fridge to chill for 15 minutes. Turn your oven to gas mark 3/325°F/170°C and leave to heat up. After the shortbread mixture has chilled, bake on the middle shelf for 1 hour until firm and golden brown. Remove from the oven and leave to cool in the tin.

Whilst the mixture is cooling, make the chocolate-champagne ganache. Melt 100g chocolate over a pan of simmering water, stirring occasionally. Once the mixture is smooth remove from the heat and stir in the champagne and double cream until fully combined. Place in the fridge to chill.

Once the shortbread is completely cold, spread a layer of the ganache on the top, using a spatula to flatten the mixture as much as possible. Place back in the fridge for 15 minutes to set further.

Whilst this is setting make the caramel by heating the butter, condensed milk and sugar in a saucepan, bringing to the boil but all the time watching it carefully! Reduce the heat and cook for 4-5 minutes until the caramel starts to come away from the sides of the pan. Pour the caramel over the shortbread and ganache before again returning to the fridge. Finally, melt the remaining chocolate and spread over the top before returning to the fridge for a final 30-minute chill. Remove from the tin and cut into small squares before serving. To paraphrase Caroline, ‘Get your rich on’ and enjoy!

Baking · Europe · Macaroons · Nation Cake Challenge

France: Mont Blanc Macarons

Flag of France

Of all my baking achievements up to this point, mastering macaroons is definitely one of the ones that I am most proud of. This was a difficult technique to master, not in the least because most recipes for macaroons are made using the Italian meringue technique, which involves whipping boiling sugar syrup into beaten egg whites. This technique terrifies me – I have visions of it spraying everywhere, covering me and the kitchen in red-hot sugar, a total kitchen horror movie. I spent a long time searching for a recipe which didn’t involve this technique but couldn’t find one. Then Max’s aunt in Phoenix, Arizona came up with the goods, sending over a lovely book of macaroons made without Italian meringue. I was so excited that day – I think she must have an amazing ability to read minds across the Atlantic!

With this book in my possession,  the (macaroon) world was now my oyster, and I became intrigued by the beautiful delicate sweets. It was through the recipe for tiramisu macaroons that I discovered my addiction to sweet sherry mixed into marscapone cheese, and reminded myself of the wonderful combination of chocolate and hazelnut (macaroons and nutella – so good!) At my recent masters graduation I sampled all the flavours provided at the drinks reception (to the great amusement of my family) and I love the fact that my hometown now has a macaroon stand in the shopping centre. However, there is nothing like making them yourself, and the confidence that making something more complex can give you.

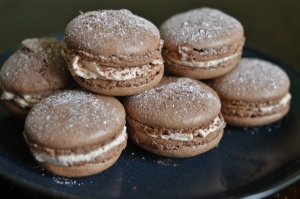
DSC_0008

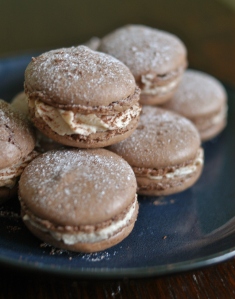
This recipe is one of my favourite combinations, that of chocolate and chestnut. This delicious, rich combination provides a wonderful decadent dessert which contrasts with the crisp shell of the macaroon. The Mont Black itself is a dessert of sweetened chestnut puree topped with whipped cream, and was apparently often served at the house of Lucrezia Borgia! (I suppose it is to die for… baboom!) Combined with the chocolate macaroon shell this makes a bite-size treat made in heaven!

DSC_0005

Excitingly, the Classic French Challenge of the Month, which is being hosted by A Kick at the Pantry Door is focusing on macaroons – perfect timing! I couldn’t resist therefore submitting these as an entry.

Mont Blanc Macaroons

Ingredients:

  • 3oz/78g ground almonds
  • 5oz/125g (1 cup) icing sugar, plus extra for dusting
  • 2 tbsp cocoa powder
  • 2 large egg whites
  • 2oz/56g caster sugar
  • 8floz/240ml double cream
  • 1/4 cup sweetened chestnut puree
  • 2 tbsp dark chocolate, grated.

Instructions:

Line two baking sheets with parchment paper. Use a pencil to draw 24 circles approximately 1-1.5 inches in diameter. Turn the paper over so that the lines show through, but you aren’t eating graphite!

Process the ground almonds, icing sugar and cocoa in a food processor for 15 seconds, before sifting into a bowl. Whisk the egg whites to the soft peak stage before gradually beating in the icing sugar until the mixture forms stiff peaks, and turns very glossy. Fold the almond mixture in a third at a time and continue to fold the mixture until it forms a thick shiny consistency, which forms a ribbon when the spatula is lifted out of the bowl.

Pour the batter into a piping bag fitted with a 0.5in round nozzle and pipe onto the prepared baking sheets.Holding each end of the tray, lift it up and sharply tap it onto the work surface – this will remove any air bubbles that may be present in the mixture. Leave them to rest for 30 minutes at room temperature. Whilst they are resting, preheat the oven to 160°C/325°F/ .

At the end of the 30 minutes, bake in the oven for 15-20 minutes. Remove and cool for 10 minutes before carefully peeling off the baking parchment and allowing to cool completely.

Make the filling by whipping the double cream to the soft peak stage before folding in the chestnut puree. Pipe the puree onto half the macaroons and top with the chocolate shavings before sandwiching with the remaining macaroon shells. To finish, sift over a light shower of icing sugar.

Bread · Europe · Nation Cake Challenge · Uncategorized

France: Pain Brié

Flag of France

Much as I hate to say it, there is only so much cake that you can eat. Particularly as a baking blogger, the question of what to do with the remaining cakes. I’m lucky in that I have a very hungry younger brother who is a willing tester for many of the recipes when he is back from university, but otherwise it can come down to just Max and I to eat it, which can leave you feeling very fat. The problem was partially solved when my mum provided me with some lovely small round baking tins which belonged to my grandmother, but even so!

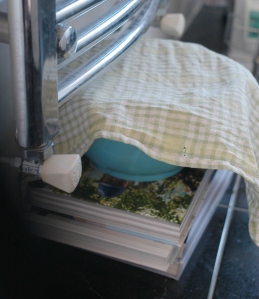
Every so often then I make something else, and today that something is bread. I have mixed feelings towards bread – I love tiger bread and could quite happily eat half a loaf in one sitting, but as much of the bread around these days is plastic white sliced sandwich bread, I don’t tend to eat much of it. Homemade bread is a different matter, but my house is not made for baking bread, and I find it almost impossible to make it rise! The only way I’ve managed to successfully get dough to rise is to place the bowl on a pile of books stacked under the bathrooms heated towel rail – not the best situation to be in!

DSC_0001

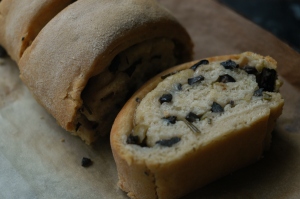
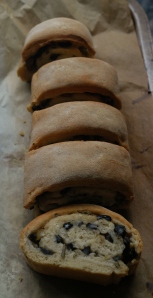
However, when I make bread, I remember why it’s worth all the hassle! This loaf is a prime example of how good proper bread can be – a Normandy-style bread, filled with both black and green olives and rosemary. Delicious for a picnic, and very simple to make! It can be served either hot or cold, and does not need any topping to improve it – the ultimate one hand snack! The recipe is taken from Rachel Khoo’s book The Little Paris Kitchen

DSC_0001

DSC_0006

Pain Brié

Ingredients:

Fermented Dough:

  • 10g yeast
  • 10ml warm water
  • 200g plain flour
  • 2 generous pinches of salt

The bread:

  • 5g dried yeast
  • 4 tbsp warm water
  • 85g plain flour
  • pinch of salt
  • a knob of butter
  • 300g fermented dough

The filling:

  • 50g green olives, chopped
  • 50g black olives, chopped
  • 1 tsp finely chopped rosemary
  • 20ml olive oil

Instructions:

First make the fermented dough, something that must be done the night before. Mix the yeast and warm water and stir until all the yeast has dissolved. Place the flour and salt in the bowl and quickly mix before adding the yeast mixture. Stir to combine before turning out onto a floured surface and knead until it forms a smooth dough. Place in a bowl, cover with a tea towel and leave to rise in a warm place for 1 hour. Refrigerate overnight before continuing.

The next day, dissolve the yeast in the warm water, before mixing the flour and salt in a large bowl. Add the yeast mixture, fermented dough and butter before bringing together to form a ball. On a floured surface, knead for 15 minutes until smooth, and leave to rise for 30 minutes.

Make the filling by mixing together the olives, rosemary and oil. Roll out the risen dough so that is it 1 inch thick and about the size of a piece of A4 paper. Spread the olive mixture on top of the dough, and roll up lengthways into a long roll. Place join-side down on a baking tray lined with baking paper. Us a sharp knife to cut deep slits in the dough (ensuring that you d not cut all the way through!)  and cover with a damp tea towel before allowing to rise for 1 hour (it should have doubled in size).

Preheat the oven to Gas mark 9/240°C/475°F with a baking tray in the middle and a roasting tin in the bottom. Once hot, slide the roll (still on the baking paper) onto the hot baking tray, and pour a galss of water into the roasting tin. Bake for 5 minutes before reducing the heat to gas mark 7/210°C/425°F and bake for a further 20-25 minutes. Transfer to a wire rack to cool.

Baking · Cake

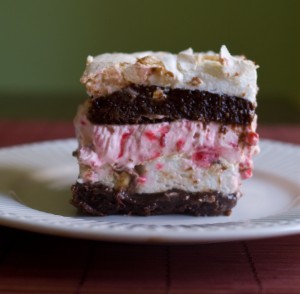
Baking Brave: Chocolate Brownie Meringue Torte

imagesDo you have a competitive streak? Most of us will have a tendency towards a form of competition, whether it be in academic or social terms. Mine is generally dormant – usually I’m quite good at thinking positively and non-competitively towards my actions and those of others. However, there is an exception to this, and for me that exception is baking.

When it comes to the culinary arts, I have a real ‘can-do’ attitude. Paul Hollywood tells us how difficult macaroons are to make, I obsess over them for the next few months until I can make them right. Puff pastry is seem as too difficult to make for amateurs – I’ll prove them wrong! As the for the dreaded croquembouche, I’ve got you in my sights… Therefore when World Baking Day announced their bake brave challenge, with 100 cakes of different levels of difficulty, I imediately clicked on no. 100 – the hardest.

Raspberry Torte Final

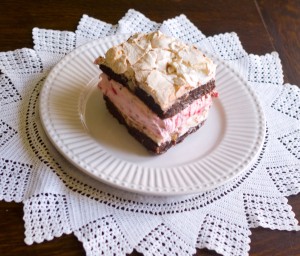
Yes, my competitive spirit kicked in big time, but then reality struck. Whilst a choux pastry tower would be impressive, it was not going to be a suitable choice. Not because I couldn’t do it, but rather because we couldn’t eat it. So reluctantly I scaled down my ambition and settled on option 91 – the chocolate brownie raspberry torte. My sense of pride only slightly dented, I made this cake, constructed it and promptly had to hide the leftovers – what more needs to be said!

raspberry torte 4

This recipe also forms my entry for the Calendar Cakes Challenge, being hosted by Laura Loves Cakes and Dolly Bakes, which
challenged you to make one of the cakes from the Bake Brave 100 list

calendar-cakes

Chocolate Brownie Meringue Torte

Ingredients:

Brownie base:

  • 200g good-quality dark chocolate
  • 200g margarine
  • 250g icing sugar
  • 3 medium free-range eggs
  • 110g plain flour

Meringue topping

  • 4 medium free-range egg whites
  • 1/4 teaspoon cream of tartar
  • 200g caster sugar
  • 100g chopped roasted hazelnuts

To fill:

  • 300ml whipping cream
  • 100g icing sugar
  • 300g fresh raspberries

To finish (optional):

  • 200g fresh raspberries
  • 100g toasted hazelnuts, roughly chopped.

Instructions:

Preheat the oven to 190°C/375°F/gas mark 5. Roughly chop the chocolate, set 20g aside for later, and put the remaining 180g into a heatproof bowl. Set the bowl over a pan of steaming water and leave to melt gently, stirring frequently. (Do use a bain-marie, rather than try and melt it in a saucepan like I did – first lot of chocolate had a nice burnt taste to it…)

Meanwhile, beat the soft margarine with the icing sugar until very light, creamy and fluffy before adding the eggs, beating well after each addition. Gradually beat in the flour and the cooled, melted chocolate. When thoroughly combined, stir in the reserved chopped chocolate. Divide the mixture between the prepared tins and spread it out evenly. Bake for 8 minutes – the mixture will not be cooked but will have started to form a crust.

While the mixture is baking, whisk the egg whites with the cream of tartar in a bowl until stiff peaks form. Whisk in the sugar in four batches, to make a smooth and glossy, thick meringue. Fold in the chopped hazelnuts (I have also used almonds which also work well)

Remove the cake tins from the oven and reduce the temperature to 170°C/325°F/gas mark 3. Divide the meringue equally between the two brownie-filled tins, and gently spread it over the still soft mixture to cover evenly. Bake for another 35-40 minutes until the meringue is golden and the brownie cooked! If the meringue looks like it is burning, cover with foil.

To make the filling, whisk the cream until soft peaks form, then add the icing sugar and 200g of the raspberries. Whisk briefly, to make a thick, pink cream. Fold in the remaining 100g of raspberries.

Run a round-bladed knife around the inside of each tin to loosen the cakes. Turn out the flat-topped meringue cake on to a serving plate, meringue-side down. Spread with the raspberry cream and top with the second cake. Decorate with the remaining raspberries and hazelnuts if wished.

Main Meals

Sweden: The Eurovision Feast

The flag of Sweden

Well, Eurovision is now over. Congratulations to Denmark on their well deserved win, and to Sweden on holding a very good concert last night. With the usual mix of ‘interesting’ numbers and countries who take it half seriously, my favourite track was definitely this one, (the national interval performance) – I’m just sad you couldn’t vote for it!

As you saw on Saturday, to celebrate the Eurovision Song Contest we enjoyed a Princesstårta, a traditional Swedish cake. This post chronicles the rest of our Swedish meal, and provides the recipes for those dishes. Our menu included:

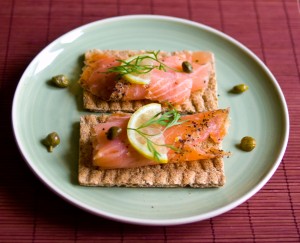
  • Gravlax on crispbread with pepper, lemon, capers and dill
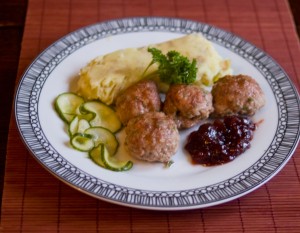
  • Swedish meatballs with boiled potatoes, lingonberry jam and pickled cucumbers
  • Princesstårta (recipe here)

Now when there are only two of you, cooking a three-course meal can seem like a lot of fuss, but it is a task that really gives you a sense of occasion! Now Eurovision may seem a rather silly occasion to celebrate, but when all birthdays and other celebrations occur around Christmas, you have to have some things to look forward to during the rest of the year! More to the point, with a program as long as Eurovision, you need a lot of food to break it up!

Anyway, enough justifying – I love Eurovision and need no excuse to cook a lot of food – the stage was set!

Gravlax on Crispbread with Lemon, Pepper, Capers and Dill

Gravlax

Ok, this doesn’t really need a recipe, but a list of ingredients can be useful.

  • Smoked Salmon (Gravlax if you can get it)
  • Crispbread (I was short on time so used Ryvita – cheating I know!)
  • 8-10 peppercorns, crushed with a pestle and mortar (or freshly ground black pepper)
  • 1/2 lemon, sliced
  • 1 tsp chopped dill

Instructions:

Start with the crispbread and top with a folded piece of smoked salmon. Squeeze a little lemon juice over and garnish with a thin slice of lemon, black pepper and a few capers. Top with a sprig of dill.

Meatballs with Potatoes, Pickled Cucumbers and Jam

Meatballs Final

Ingredients (Serves 4):

Meatballs:

  • 300g minced pork
  • 300g minced beef
  • 1 large egg
  • 100ml milk
  • 75g dried breadcrumbs
  • 1 teaspoon ground allspice
  • sea salt and freshly ground black pepper
  • a handful of dill and parsley, roughly chopped.

Pickled Cucumbers:

  • 1 cucumber
  • 1 tbsp salt
  • 12 floz/360ml water
  • 4 floz/120ml  white wine vinegar
  • 8oz/225g sugar
  • 1 bay leaf
  • 2 allspice berries

Side Dishes:

  • Potatoes of some type – mashed, boiled, chipped, it’s up to you!
  • lingonberry jam (blackcurrant, blackberry or cranberry jams can be used if you cannot get lingonberry)

Instructions:

The day before you wish to eat, make the pickled cucumbers – this will give them time to marinate. Slice the cucumber as thinly as you can (a mandonline can be useful for this) and toss them with salt. Place into a colander and leave for 30 minutes. Combine the rest of the ingredients in a saucepan and bring to the boil, before removing from the heat and allowing to cool. Rinse the salt off the cucumbers and squeeze out any remaining moisture. Place the cucumbers in a bowl and add the pickling  liquid, ensuring they are completely covered. Leave for at least 6 hours before serving.

To make the meatballs, reserve a tablespoon of the herbs before adding all the ingredients to a large bowl. Mix thoroughly, using your hands – this works better than anything else! Use the mixture to make 30 meatballs, wetting your hands to ensure a neat shape. Place on a baking sheet, cover with cling film and chill for at least 1 hour.

Heat up your largest pan and add a small amount of olive oil. Add the meatballs and cook for 10-15 minutes until golden brown and cooked through. Stir occasionally, but be gentle – you don’t want them to break up into mince! (though if it does, add a tin of tomatoes and a splash of red wine and call it ragu!) Serve the meatballs with the pickled cucumbers, homemade chips and a jam of your choice.

Cake · Cake Decorating · Europe · Marzipan Modelling · Nation Cake Challenge

Sweden: Prinsesstårta (Princess Cake)

The flag of Sweden

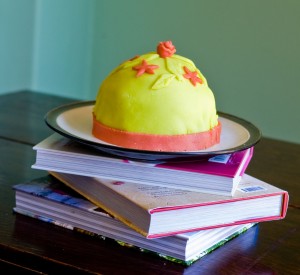
Happy Eurovision weekend! The Annual Eurovision Song contest is definately a love it-hate it event. We are definately in the ‘love it’ category – I have been excited about this for a while now. As the event is being held in Malmo, Sweden this year, this seemed like a perfect time to have a go at one of the more complex creations of this challenge, the Swedish Princess Cake or Prinsesstårta.

I have something to confess – as of this moment, my knowledge of Swedish cuisine is mostly gathered from IKEA. Disgusting I know. As a result, my target for this cake was to find a recipe for a cake, that couldn’t be bought in IKEA. The Princess Cake immediately caught my eye during the research period due initially to the decoration – green marzipan covering with pink roses – lovely! The next thought was ‘how do you cover a mound of whipped cream with marzipan without it sinking?’ True to form, I never forgo a challenge and the cake was chosen!

Princesstarta

The Princess Cake or Prinsesstårta was originally created in the 1930’s by Jenny Âkerström, a teacher employed by Prince Carl of Sweden and Norway. Originally called Grön Tårta (Green Cake), it was renamed due to its popularity with the Duke’s daughters. A very delicate construction, it consists of three layers of light sponge, sandwiched with creme patisserie and fruit (as shown below),  a layer of plain creme patisserie, and topped with a mound of whipped cream. Next the whole confection is covered in a layer of thin coloured marzipan and and decorated with pink marzipan roses.

Princesstarta layers

The recipe for this cake is based on one by Donal Skehan, taken from here.

Prinsesstårta (Princess Cake)

Ingredients:

For the sponge layers:

  • 4 large free range eggs
  • 170g caster sugar
  • 120g plain flour
  • butter for greasing the tin

For the Crème Patissière:

  • 1 vanilla pod
  • 450ml milk
  • 120g caster sugar
  • 6 large free range egg yolks
  • 50g cornflour
  • 50g unsalted butter, softened

For the filling and assembly:

  • 125g fresh raspberries
  • 750ml double cream, whipped to soft peaks
  • 500g marzipan (use red or pink food colouring
  • if you can’t find pink marzipan)

Instructions:

Preheat the oven to 190°C and grease and line a 20cm springform cake tin with parchment paper.

Beat together the eggs and the sugar until pale and fluffy.  Sift the flour in to the bowl and fold gently into the egg mixture, until you are left with no lumps in the bowl.  Pour the mixture into the cake tin.

Bake on the middle wrack of the oven for 15-20 minutes or until a skewer inserted into the centre comes out clean.  Leave the cake to cool slightly in the tin and then turn it out on to a cooling rack.  When completely cool, using a bread knife, divide the cake into three even layers.

For the crème patissière, split the vanilla pod in half and scrape out the seeds.  Add this to a medium saucepan with the milk and place over a medium high heat.  Bring to the boil and then turn off the heat.  Scoop out the vanilla pod.

While the milk is coming to the boil, place the sugar, cornflour and egg yolks in a large mixing bowl and beat with a whisk until thick and pale.  Pour the hot milk into the bowl, whisking quickly and continuously until it is smooth and incorporated.  Pour the mixture back into the saucepan and place over a medium heat beating continuously until it has thickened.

Transfer the crème pâtissière to a cold bowl, create a flat surface with the back of a spatula and wipe the top with a little butter (this will prevent a skin forming).  Cover directly with cling film and allow to cool completely.

Place one of the cake layers on a cake stand.  Use one-third of the crème pâtissière to pipe three circles around the base of the bottom layer, starting from the outside, in.  Place the raspberries inside the creme patisserie circles.  Mix a spoonful of the cream with a little of the creme patisserie and pipe over the raspberries.  Put on the next layer of cake and spread with half the remaining crème pâtissière over the top. Put the last layer of cake in place and spread the remaining crème pâtissière on top.  Spread the cream over the top and sides of the cake, creating a smooth dome shape.

In a bowl, add a drop of food colouring to the marzipan and knead it until you have an even pink colour.  Dust a clean surface with icing sugar and roll out the marzipan until it’s about 1mm in thickness.  Cover the cake with the marzipan, trimming the excess around the edges. (You can use the excess marzipan to make the little rose on top.)

Dust the cake with icing sugar and place a little marzipan rose on top.

Desserts · Vegan

Vegan Chocolate and Orange Mousse

I am really excited about this vegan dessert, and so happy it worked! Presenting number two in the vegan dessert duo – Chocolate and Orange mousse!

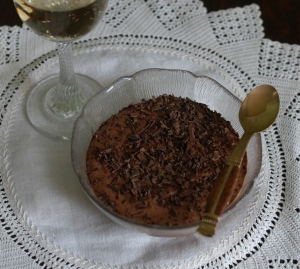
DSC_0001

I love chocolate mousse. One of my guilty pleasures is those chocolate mousses that come in yoghurt pots, but there is nothing to beat the deliciousness of actual chocolate mousse. However, I have a thing about using raw egg in anything and most recipes for chocolate mousse either have raw egg or so much cream that it turns into a ganache. This however, solves that problem! Four ingredients, 5 minutes and you are sorted with a delicious light pudding that almost feels healthy! Enjoy!

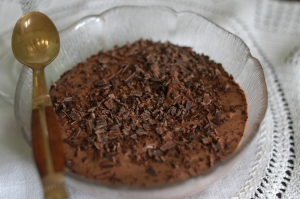
DSC_0007

Vegan Chocolate and Orange Mousse

Ingredients:

  • 1 can of chilled coconut milk
  • 1/4 cup unsweetened cocoa powder
  • Pinch of salt
  • 1 tsp orange liqueur
  • 1/2 cup icing powder

Instructions:

Place the sold layer of coconut cream in a bowl and add the other ingredients. Beat for five until doubled in size and light and fluffy. Serve in small dishes with chocolate shavings to decorate.

I think this might be the easiest recipe in the world. Delicious, simple and very addictive! Come back in two days for a return to cake, and most specifically a Eurovision-themed post! Cannot wait!

Desserts · Vegan

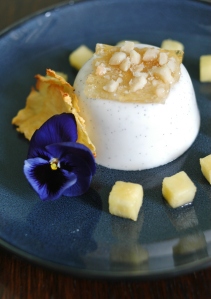
Vegan Coconut and Vanilla Panna Cotta, Macadamia Tuille and Pineapple

Over the next few posts we are going on a slight diversion from the cake-based goodness you are used to, and instead will be talking about dessert. Specifically, vegan desserts, and I will be giving you the recipes for two that I tried recently. This was a new challenge for me, as I am not vegan myself, and have had basically no experience in this type of cooking. However, I was asked to make dessert for a family dinner and one of my cousins who would be in attendance is a very committed vegan. Now, whilst the easy option was to make a fruit salad or the like I decided that I didn’t really want to do that – rather I wanted to make a dessert that everyone could eat and enjoy – one that was vegan without looking vegan!

Now this is easier said than done, as the majority of desserts include some form of animal product, whether it be eggs, butter, cream or honey. Coupled with the fact that Max is strongly allergic to banana (another ingredient often used in vegan cooking) made it quite a large challenge! So I did what every sensible person does in this situation and hit Pinterest.

DSC_0004

I decided that I would make a trial run of several desserts, having never attempted vegan cooking before. I selected three contrasting desserts, made mini tests of each of them and had a taste test! The three recipes were a coconut and vanilla panna cotta, a chocolate and orange mousse and a lime cheesecake. Two out of the three were successful, and the third (the lime cheesecake) was not unsuccessful – it tasted great, I just need a better blender!

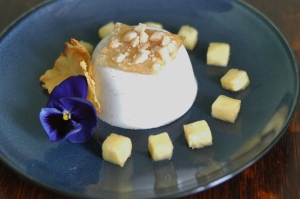
Today then, I present the first of these recipes – a vegan coconut and vanilla pannacotta served with a caramel macadamia tuille and both dried and macerated pineapple. This recipe could also be used successfully for non-vegans as the flavours themselves are lovely (I actually adapted the recipe from a non-vegan version!)

DSC_0005

Vegan Coconut and Vanilla Pannacotta, Macadamia Tuille and Pineapple (Two Ways)

Ingredients:

Panna cotta:

  • 20g vegetarian gelling agent
  • 150ml/5floz rice milk (or your preferred milk equivalent)
  • 150ml/5floz cream substitute
  • 25g/1oz caster sugar
  • 1 vanilla pod, split lengthways
  • 100ml/3flz coconut milk

Tuille:

  • 50g macadamia nuts
  • 50ml/2flz orange liqueur
  • 100ml/31/2floz water
  • 150g caster sugar
  • 1 tsp liquid glucose
  • Pineapple and edible flowers to decorate

Instructions:

Panna cotta:

Place the milk, cream, sugar and vanilla pod and heat until the sugar dissolves, before removing the pan from the heat. Stir in the coconut milk, ensuring the mixture is completely smooth. Add the gelling agent to the pan and bring to the boil, ensuring that you stir constantly. Cook for two minutes before removing from the heat and pouring into metal ramekins. Place in the fridge to set for at least two hours.

Macadamia Tuille:

Crush the macadamia nuts in a pestle and mortar, before placing on a baking sheet and gently toasting for a few minutes (keep your eye on them – I can promise you that if you even think of leaving them, they will burn!) Place the liqueur, water, sugar and glucose in a pan and cook over a high heat, swirling the pan occasionally. Allow it to become a nice amber colour, before removing from the heat and pouring onto a silicone baking mat. Spread it with a spatula until it is very thin,and sprinkle with the macadamia nuts. Cut out four discs (about 2in in diameter) and allow to cool completely.

Pineapple Crisps:

Peel and de-eye the pineapple, before cutting very thin slices using a large broad-bladed knife. Lay these on a foil lined baking sheet and bake in the oven at gas mark 1 for about 1 hour until they have started to dry out and the edges have gone golden, turning occasionally. Remove from the oven and leave to dry completely. You can create pineapple flowers by placing the slices in muffin tins to cool. Cut the remainder of the pineapple into cube and place in a bowl with a little lime juice and sugar.

To complete the dish, Remove the panna cotta from the fridge and remove from the mould, loosening with a sharp knife as necessary. Place in the centre of the plate and place the tuille on top. Position pineapple flowers to one side, and add cubes of pineapple. Finish with an edible flower.

And there we go – my first vegan dessert! In two days time, return for chocolate mousse – vegan style!