Baking · Biscuits · Cookies

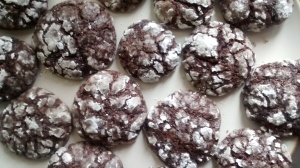
Chocolate Truffle Cookies

I am not always the most patient person in the world. Some things don’t bother me. Transport delays don’t really bother me – I’m generally hideously early so it’s rare that a delay is ever a real problem.

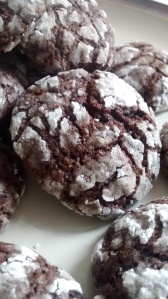
IMG_20140306_163716645

However, when it comes to baking I have no patience. And that is a real problem. Baking is all about patience – waiting for bread to rise, waiting for pies to cook, waiting for cakes to cool in preparation for icing. There is no short cut, you’ve got to let it happen at its own speed. And sadly that’s where I fall short.

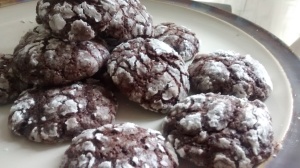
IMG_20140306_163637436

Cookies are generally a quick thing to make – a great thing to make after work when you just need a quick fix, right? Well sort of. These are very simple to make, but they do require patience. You have to wait for them to chill, bake and then cool. And you have to let these cool. It may take all your willpower to do this but it will be worth it.

IMG_20140306_163646475

Chocolate Truffle Cookies

Ingredients:

  • 3oz plain flour
  • 1oz cocoa powder
  • 1/2 tsp baking powder
  • 3oz caster sugar
  • 1oz butter
  • 1 egg
  • 10ml kahlua
  • 1 3/4oz icing sugar

Instructions:

Sift the flour, cocoa powder and baking powder together before stirring in the sugar. Rub the butter into the mixture using your fingers until the mixture resembles breadcrumbs.

Mix the egg and kahlua together and add to the butter and dry ingredients. Stir until a dough is formed – this will take MUCH longer than you think! It will come together though, so don’t feel the need to add any more liquid – it will make the mixture too loose. Chill the dough for at least 30 minutes.

Preheat the oven to gas mark 5 and line a large baking sheet with parchment paper. Take walnut sized pieces of the mixture and roll into balls, and then cover with the icing sugar. Be generous as this will give  the cookies the lovely crispy sugar coating. Place the round cookies onto the baking sheet and bake for about 12 minutes, until cracked on the top and firm to the touch. Cool the cookies before serving (if you can wait long enough!)

Baking · Cookies · Europe · Nation Cake Challenge

Piedmont: Brutti Ma Buoni

coat of arms of Italian region Piedmont

These biscuits have a sad life, the ugly duckling of the baking world. Burdened with the name Brutti Ma Buoni, these biscuits are literally called ‘Ugly but Good.’ Not really the best description, when – let’s face it – they’re more plain Jane than Ugly Betty. However, moving past the name, these biscuits really metamorphose into the swan – tasty, crunchy and slightly chewy, they are just the thing to accompany your afternoon caffeine hit. Whilst the initial response to the name may be unfortunate, the second part is as true as it can be.

66895_10100542733569983_2135728639_n

I have added chocolate chips to the mixture which are not traditional and may be left out if desired. However, I personally think that the biscuits are improved by the inclusion of these little chocolate-y morsels. You could also add in larger pieces of hazelnut in, or even pieces of dried fruit if preferred, however if you can resist the combination of chocolate and hazelnut you are a stronger person than I!

Brutti Ma Buoni

Ingredients:

  • 2 cups hazelnuts, toasted and skinned
  • 1 1/4 cups sugar
  • 4 large egg whites
  • 1/2 teaspoon salt
  • 1 teaspoon vanilla extract
  • 1 cup dark chocolate chips

Instructions:

Preheat the oven to 325°F/165°C/Gas Mark 5 and line 2 baking sheets with parchment paper. Place your oven shelves as close to the middle as possible.

Spread the hazelnuts out on a baking sheet and toast for 8 minutes, shaking the tray occasionally. Remove from the oven and rub he nuts in a clean tea towel in order to remove the skins. Place the skinned hazelnuts in a food processor and blend with the sugar until it forms a finely ground mixture. Scrape this mixture into a large bowl.

Using a electric mixer, beat the egg whites and salt until stiff peaks form. Fold the egg whites into the nut mixture using a rubber spatula before gently mixing in the vanilla.

Place tablespoons of the batter onto the baking trays and bake for 25-30 minutes, until firm and golden brown. Remove from the oven and let cool, before repeating with the remains of the mixture if necessary. Serve with coffee and enjoy!

Baking · Cookies · Europe · Nation Cake Challenge · Pastry

Latvia: Alexander Torte

Flag of Latvia

Tracing the history of a cake can be tricky, particulary when several countries claim it for their own. Such is true with this recipe. Whilst many feel that it is a Latvian dessert (hence its inclusion here), it has also been claimed by the Estonians, Finnish and Swedish cuisines. The reason for its creation is just as murky; the generally accepted statement is that it was created for Alexander I, yet the reason for the creation of this dessert has eluded me.

Alexander Torte

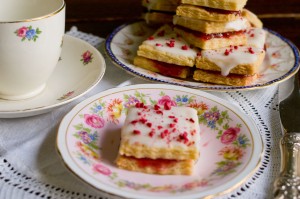
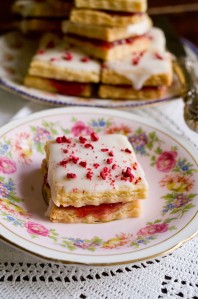
On the surface, this dessert looks deceptively simple, consisting of two layers of sweet pastry, sandwiched together with a layer of raspberry jam and then coated with a thin lemon glace icing. The tricky part of this dessert is undoubtedly working with the pastry – sweet pastry is notoriously hard work with, being very crumbly, and one false move will lead to this delicate pastry falling apart. I used individual cutters to help combat this, rather than creating one big sheet as is traditional. I love the raspberry and lemon combination, but this recipe could be altered to choose any flavours that you wish. The result is a cross between a pastry and a biscuit, and is delicious served with a strong espresso for afternoon tea.

Alexander Torte 2

Alexander Torte

Ingredients:

  • 1 cup caster sugar
  • 3 cups plain flour
  • 1/2 tsp salt
  • 1 tsp vanilla extract
  • 2 cups butter
  • 1 cup raspberry jam
  • 4 tbsp lemon juice
  • 2 cups icing sugar

Instructions

Put the dry ingredients in a bowl and mix briefly before kneading in the butter. Chill for 20 minutes before rolling out and cutting into shapes of your choice. Place on a baking tray and bake in a preheated oven (350° F/180° C) for 12 minutes until golden. Remove from the oven and leave to cool.

Spread the pastry with the jam before placing the second layer on top. Mix the icing sugar and lemon juice and spread over the tops of the biscuits. Serve with strong coffee.

Baking · Cookies

Cappuccino Biscotti with Chocolate Chips.

Rachel:

‘Look look look look look! My first paycheck. Look at the little window. There’s my name. Hi, me! Isn’t this exciting! I earned this. I wiped tables for it, I steamed milk for it, and it’s – not worth it. Who’s FICA? Why is he getting all my money?

[Friends, Series 1 episode  4]

Now regardless of the amount of money you earn, I’m sure we’ve all felt like this when looking at our paychecks – not complaining about the pay itself, but having the sudden realisation that being quoted a certain salary doesn’t mean you actually get all that money. In my case, I sat down to work out what would be taken off and due to some bad arithmetic on my part ended up panicking that I didn’t actually have enough money to live!

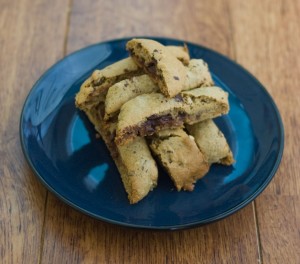
These biscuits are a good thing to make when times are feeling particularly hard, as the majority of the ingredients you will be likely to have in the house already, especially if you are a regular baker. They are very quick to make, and last a long time if stored correctly so will help you in those times when you need something sweet but the bank balance is saying ‘No’!

Coffee and Chocolate Biscotti

The recipe is taken from one of my funniest cookbooks ‘Cooking With “Friends”‘, a present from my dad who found it in the local charity shop. For those ‘Friends’ afficionado’s amongst us, it gives you recipes for Phoebe’s oatmeal and raisin cookies, Nora Bing’s Kung Phao Chicken and George Stephanopoulos’s pizza (I will be very happy if there are other people out there who get all these references!) This recipe for biscotti is taken from a section on Central Perk, and if they serve these, then I would also be there all the time!

Cappuccino Biscotti with Chocolate Chips

Ingredients:

  • 2 cups plain flour
  • 1 cup caster sugar
  • 1/2 tsp ground cinnamon
  • 1/2 tsp baking powder
  • 1/2 tsp baking soda
  • 1/2 tsp salt
  • 2 tbsp milk
  • 1/4 cup strong black coffee
  • 1 large egg yolk
  • 1 tsp vanilla extract
  • 2/3 cup whole almonds
  • 1/2 cup dark chocolate chips

Instructions:

Preheat the oven to 375°F. Add the flour, sugar, cinnamon, baking powder, baking soda and salt to a bowl and briefly mix. Stir the milk in the coffee before adding the vanilla extract and egg yolk. Mix well then add to the dry ingredients and stir to make a smooth dough (add a little more milk if necessary). Stir in the nuts and chocolate chips.

Line a baking sheet with paper. Roll half the mixture into a log, place on the baking sheet and repeat with the other half of the mixture. Bake for about 20 minutes until firm to the touch, but not completely cooked. Remove from the oven and reduce the temperature to 325°F. Cut the logs into slices 3/4in wide and place on their side on the baking sheet. Return to the oven and bake for another 10-15 minutes until crisp.

Stored in an airtight container, these will keep for at least a week.

Baking · Cookies · Nation Cake Challenge · North America

Massachusetts, America: Chocolate Chip Cookies

Flag of the United States of America

Chocolate chip cookies. Possibly one of the most evocative recipes, and one that will be likely to take you back to your childhood, whether they be soft chewy American-style cookies or the small crisp Maryland cookies(/biscuits, depending on your definition of cookies!) For such a popular recipe, it seems surprising that the original chocolate chip cookies were actually an accidental creation by Ruth Graves Wakefield, owner of the Toll House Inn in the 1930’s. Running out of chocolate for her famous chocolate biscuits, she substituted chocolate chips, hoping that they would melt into the chocolate cookie batter which they did not, thus creating the chocolate chip cookie. Apparently she then sold the recipe to Nestle in exchange for a lifetimes supply of chocolate chips – sounds like a good deal to me!

Ruth Wakefield’s recipe is still in use today, printed on the back of every bag of Nestlé chocolate chips (I’m sure many of you will be familiar with the F.R.I.E.N.D.S. episode where Monica spends days trying to recreate Phoebe’s grandmother’s fabulous cookie recipe only to find that it is the Nestlé Toll House recipe!) The cookies were also sent to US troops during WWII, and became so popular that a national craze was started, continuing today. It has also been designated as the Official State Cookie for Massachusetts, though I am not convinced that other states have this honour, so it isn’t really so important!

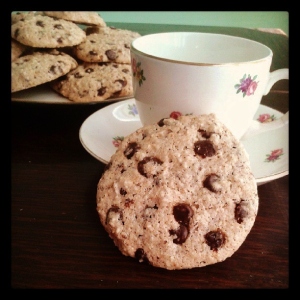
DSC_0016

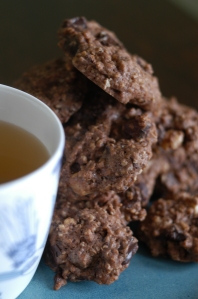
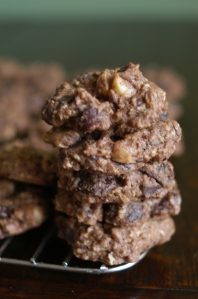
Chocolate chip cookies are one of those recipes that everyone will have made at some point, and as a consequence everyone thinks that their recipe is the best! Type ‘chocolate chip cookies’ into Google search and most of the returned results will be titled (or at least mention!) some form of plaudit, that their recipe is ‘the best ever!’ Now at some point when I have more time I feel that I may need to actually test out these recipes and choose a victor, but for the moment all I can say is that these cookies are delicious, and you will not be disappointed!

DSC_0013

Chocolate Chip Cookies

Ingredients:

  • 115g/40z butter, softened
  • 115g/4oz caster sugar
  • 1 egg
  • 100g/3.5oz porridge oats
  • 1 tbsp milk
  • 1 tsp vanilla extract
  • 125g/4.5oz plain flour
  • 1 tbsp cocoa powder
  • 1/2 tsp baking powder
  • 175g/6oz plain chocolate, chopped
  • 175g/6oz milk chocolate, chopped
  • 56g/2oz hazelnuts, roughly chopped

Instructions:

Preheat the oven to 180°C/350°F/Gas Mark 4. Line three baking sheets with parchment paper and set aside for later.

Cream together the butter and sugar until light and fluffy before beating in the egg. Add the oats, milk and vanilla extract and beat together until well blended. Stir in the flour, cocoa and baking powder before adding the chocolate chunks and nuts.

Place tablespoons of the mixture onto the baking sheet, leaving about 2 inches in between each cookie. Bake for 20 minutes before removing from the oven and allowing to cool for 10 minutes. Remove from the baking sheet and allow to cool completely before diving in – I know it’s hard, but it’s so much better to eat them when cool!