Baking · Cake · History of Cake · Uncategorized

Positively Medieval – Development in the Middle Ages

The Middle Ages (specifically in England) was a milestone in the development of cake as a specific baked good, as this was the first time that cake and bread became two distinct forms. As discussed previously, the two terms used to be used pretty much indiscriminately, the only differentiation being size. This all changed during this period – now the term cake was used specifically to denote a baked good sweetened with sugar.

A crucial factor in baking of this time was preservation – without the methods of food preservation that we are used to today, foods needed to be able to be stored for a significant period of time. With this in mind, the two cakes that came to the fore were gingerbread and fruitcake. The Roman influence was evident in the importance of fruitcake, which had its roots in the sweetened, fruited bread mentioned last week. These cakes served two purposes – not only were they made to last for several months, they also included ingredients which would mark out the eaters of being wealthy people able to afford such ingredients.

During this period, the function of cake also developed, and it became the main celebratory dish of the period. Cakes became very ornate and elaborate, Chaucer remarking that one cake included 13 kilograms of flour, not to mention copious amounts of of fruit, cream, nuts, sugar and butter – all very expensive ingredients that really marked the owner out as a well-off member of society.

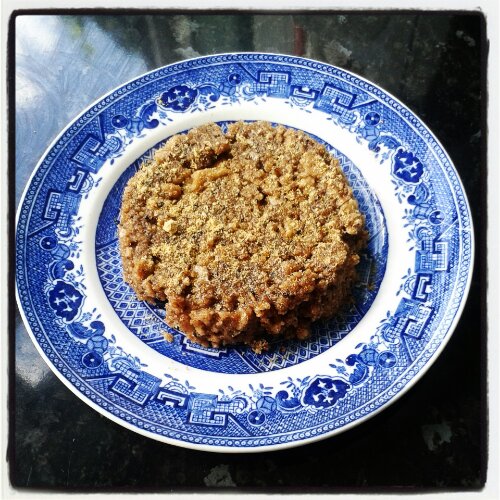
The recipe that follows in an authentic recipe for gingerbread, taken from here.

image

Gyngerbrede

Ingredients:

  • 1 cup clear honey
  • 1 small loaf of brown bread, ground into breadcrumbs
  • 3/4 tsp cinnamon
  • 1/4 tsp black pepper, ground
  • 1/4 tsp ginger
  • ground cinnamon, to finish

Instructions:

In a small pan, bring the honey to the boil before reducing the heat and allowing to simmer for 5 minutes, ensuring that you skim off any scum that may float to the top. Remove from the heat and add the spices, before mixing in the breadcrumbs a cup at a time.Knead the mixture until thoroughly combined and roll out  to a depth of 1cm. Cut into 1in squares or circles and dust with the remaining cinnamon.

Baking · Cake · Cupcakes · Europe · Nation Cake Challenge

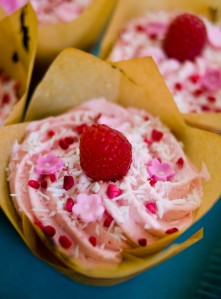
Turkey: Turkish Delight Cupcakes

Flag of Turkey.

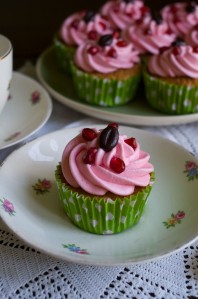
Today I’m presenting you with a new and improved version of one of the most popular cakes on this site so far, the Turkish delight cupcakes. These have without a doubt been the most raved about, most regularly made and the most searched out of the whole site, and I’m pleased to be able to give you an updated version of the recipe with some better photographs! (Always helps!) Enjoy, and if you make them, let me know what you think!

Turkish Delight Cupcake 2

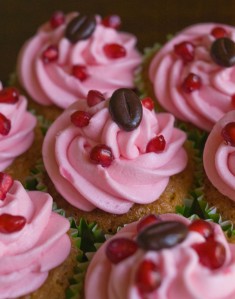
I’ve added a chocolate-covered coffee bean to the decoration of these which I feel works very well as a flavour contrast, however if you cannot get your hands on them, feel free to leave them out. Do not leave out the pomegranate seeds though, they provide a sharp contrast to the sweetness of the buttercream which is essential to the overall balance of the cake.

Turkish Delight Cupcake 1

Ingredients

Cake

  • 8oz butter
  • 8oz caster sugar
  • 4 eggs
  • 1tsp vanilla essence
  • 4oz plain flour
  • 6oz ground pistachios
  • 3tsp baking powder
  • 6 pieces rose Turkish Delight, cut in half

Rose Buttercream

  • 250g icing sugar
  • 80g unsalted butter
  • 25ml whole milk
  • 1 tsp rosewater
  • 1 drop of red food colouring
  • Chocolate coffee bean and pomegranate seeds to decorate

Instructions:

Preheat the oven to gas mark 5 and place cupcake liners in 2 12-hole cake tins (you will likely use 18 of the 24).

Beat the butter and sugar together before adding the eggs and vanilla essence. Mix in the flour, baking powder and ground pistachios and combine gently. Place a teaspoon of the mixture  into the cupcake cases  and place a piece of Turkish delight into each case. Cover with the remaining mixture and bake in the pre-heated oven for 25 minutes until golden brown and firm to the touch.

Once the cakes have completely cooled, make the buttercream by beating together the butter and icing sugar, before adding the milk and rosewater and beating for about 5 minutes until fluffy. Add the red food colouring drop by drop, mixing after each addition until a light rose pink colour is achieved. Pipe the buttercream onto the top of the cupcakes and decorate with pomegranate seeds and a chocolate coffee bean..

Baking · Cookies · Europe · Nation Cake Challenge

Piedmont: Brutti Ma Buoni

coat of arms of Italian region Piedmont

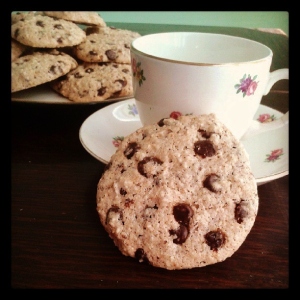
These biscuits have a sad life, the ugly duckling of the baking world. Burdened with the name Brutti Ma Buoni, these biscuits are literally called ‘Ugly but Good.’ Not really the best description, when – let’s face it – they’re more plain Jane than Ugly Betty. However, moving past the name, these biscuits really metamorphose into the swan – tasty, crunchy and slightly chewy, they are just the thing to accompany your afternoon caffeine hit. Whilst the initial response to the name may be unfortunate, the second part is as true as it can be.

66895_10100542733569983_2135728639_n

I have added chocolate chips to the mixture which are not traditional and may be left out if desired. However, I personally think that the biscuits are improved by the inclusion of these little chocolate-y morsels. You could also add in larger pieces of hazelnut in, or even pieces of dried fruit if preferred, however if you can resist the combination of chocolate and hazelnut you are a stronger person than I!

Brutti Ma Buoni

Ingredients:

  • 2 cups hazelnuts, toasted and skinned
  • 1 1/4 cups sugar
  • 4 large egg whites
  • 1/2 teaspoon salt
  • 1 teaspoon vanilla extract
  • 1 cup dark chocolate chips

Instructions:

Preheat the oven to 325°F/165°C/Gas Mark 5 and line 2 baking sheets with parchment paper. Place your oven shelves as close to the middle as possible.

Spread the hazelnuts out on a baking sheet and toast for 8 minutes, shaking the tray occasionally. Remove from the oven and rub he nuts in a clean tea towel in order to remove the skins. Place the skinned hazelnuts in a food processor and blend with the sugar until it forms a finely ground mixture. Scrape this mixture into a large bowl.

Using a electric mixer, beat the egg whites and salt until stiff peaks form. Fold the egg whites into the nut mixture using a rubber spatula before gently mixing in the vanilla.

Place tablespoons of the batter onto the baking trays and bake for 25-30 minutes, until firm and golden brown. Remove from the oven and let cool, before repeating with the remains of the mixture if necessary. Serve with coffee and enjoy!

Baking · Cookies · Europe · Nation Cake Challenge · Pastry

Latvia: Alexander Torte

Flag of Latvia

Tracing the history of a cake can be tricky, particulary when several countries claim it for their own. Such is true with this recipe. Whilst many feel that it is a Latvian dessert (hence its inclusion here), it has also been claimed by the Estonians, Finnish and Swedish cuisines. The reason for its creation is just as murky; the generally accepted statement is that it was created for Alexander I, yet the reason for the creation of this dessert has eluded me.

Alexander Torte

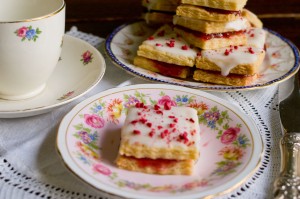
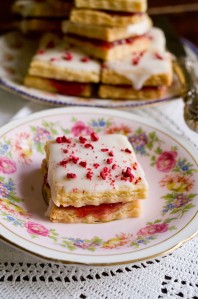
On the surface, this dessert looks deceptively simple, consisting of two layers of sweet pastry, sandwiched together with a layer of raspberry jam and then coated with a thin lemon glace icing. The tricky part of this dessert is undoubtedly working with the pastry – sweet pastry is notoriously hard work with, being very crumbly, and one false move will lead to this delicate pastry falling apart. I used individual cutters to help combat this, rather than creating one big sheet as is traditional. I love the raspberry and lemon combination, but this recipe could be altered to choose any flavours that you wish. The result is a cross between a pastry and a biscuit, and is delicious served with a strong espresso for afternoon tea.

Alexander Torte 2

Alexander Torte

Ingredients:

  • 1 cup caster sugar
  • 3 cups plain flour
  • 1/2 tsp salt
  • 1 tsp vanilla extract
  • 2 cups butter
  • 1 cup raspberry jam
  • 4 tbsp lemon juice
  • 2 cups icing sugar

Instructions

Put the dry ingredients in a bowl and mix briefly before kneading in the butter. Chill for 20 minutes before rolling out and cutting into shapes of your choice. Place on a baking tray and bake in a preheated oven (350° F/180° C) for 12 minutes until golden. Remove from the oven and leave to cool.

Spread the pastry with the jam before placing the second layer on top. Mix the icing sugar and lemon juice and spread over the tops of the biscuits. Serve with strong coffee.

Baking · Cake · Europe · Nation Cake Challenge

Russia: Korolevsky Cake with Vodka Ricotta Frosting

As the largest country on the planet, unsurprisingly Russia has a very varied cuisine, ranging from the European influences on the western side to the Eastern provinces bordering China and the Far East. We could also discuss the central areas, and the multitude of influences to be found there. Basically, finding one cake to represent Russia would be nigh-on impossible – it’s just too big!

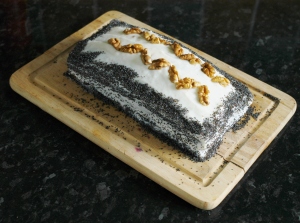
DSC_0007

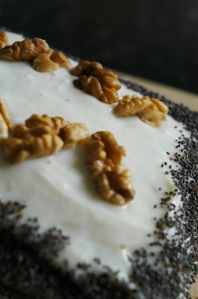
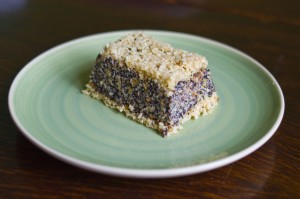
This cake is an example of the Western style of cooking. ‘Korolevsky’ translating as ‘royal’, this cake would usually be found in the imperial cities, eaten by the aristocracy. It is traditionally a three layer cake, each layer made with a different flavouring – chopped walnuts, poppy seeds and cocoa powder. I decided to break with tradition though, creating a marbled version of the cake, which also works well. The recipe is adapted from here, however, I decided to top the cake with a vodka ricotta frosting. Whilst ricotta itself is not Russian, Tvorog (a Russian cottage cheese) is very traditional in the cuisine, and so I wanted to use this influence in my frosting.

DSC_0005

 Korolevsky Cake with Vodka Ricotta Frosting

Ingredients

Cake:

  • 6 extra large eggs, at room temperature
  • 3 cups sugar
  • 3 cups sour cream
  • 3 cups flour
  • 3 teaspoons baking soda
  • 3 teaspoons vinegar
  • 1 tbsp cocoa powder
  • 2 tbsp poppy seeds
  • 1 cup walnuts, toasted & chopped

Frosting:

  • 1 pound (16 ounces) of ricotta cheese, drained of excess liquid
  • 1/2 cup of granulated sugar
  • 1/2 cup of powdered sugar
  • 2 tbsp of vodka

Instructions:

Preheat the oven to 380°F and grease 3 sandwich tins. Set aside.

To make each layer of the cake, mix two eggs with one cup of sugar until the mixture is light and fluffy. Add one cup of flour and stir to combine. In a ramekin, mix 1 tsp bicarbonate of soda with 1 tsp vinegar. When it fizzes up, stir into one cup of sour cream which should also start to rise. At this point stir into the cake batter using a spatula.

Split the mixture into 3 parts, adding a different flavouring to each one, either 1 tbsp cocoa powder, 2 tbsp poppy seeds or 1/2 cup of toasted walnuts. Alternate spoonfuls of the three mixtures into a loaf tin (or round if preferred) and use a skewer to swirl the mixtures, creating a marbled effect. Bake in the oven for 35-40 minutes or until an inserted skewer comes out clean.

To make the frosting, mix all the ingredients together until the mixture is thick and fluffy. Use this to sandwich the different layers together, before sprinkling the remaining chopped walnuts and poppy seeds on the top of the cake to decorate.

Baking · Cupcakes · Europe · Nation Cake Challenge

Scotland: Cranachan Cupcakes

Flag of Scotland. Ratio 3:5. The blue used is ...

Every so often you make something that works really well, and that needs to be repeated. These cupcakes were one of those recipes, one that was so popular that i was requested again and again, quoted as an example of a really good cake. Last time, I made this recipe as a cake, right at the start of writing this blog, but as a layer cake rather than cupcakes. Good, but less practical when there are only two of you. This time, I made it as cupcakes – a great improvement for a couple!

Cranachan Cupcakes

These cupcakes are boozy, featuring a oat-enriched cake soaked in Scotch whiskey, a raspberry whiskey compote and a whiskey-infused whipped cream topping. The cupcakes are then sprinkled with a combination of freeze-dried raspberries and rolled oats. The recipe is very similar to the original recipe, with just a few tweaks for a better flavour, based on feedback from the previous ones. Scottish or not, I can’t think of anyone who wouldn’t like one of these cupcakes for an afternoon treat.

Cranachan Cupcakes 2

Cranachan Cupcakes

Ingredients (makes 12-16, depending on your generosity)

Cake:

  • 4oz plain flour
  • 4oz rolled oats
  • 3 tsp baking powder
  • 8oz caster sugar
  • 8oz butter
  • 1 tsp vanilla essence
  • 4 eggs
  • 1/2 cup of Scotch whiskey

Raspberry Compote:

  • 2 punnets raspberries
  • 2 tbsp caster sugar
  • 1/4 cup scotch whiskey

Whipped cream topping:

  • 300 ml double cream
  • 4 tbsp whiskey
  • 2 tbsp icing sugar
  • 1 tbsp rolled oats
  • 1 tbsp freeze-dried raspberries

Instructions

Preheat the oven to gas mark 5 and line a cupcake pan with liners

Cream together the butter and sugar until pale and smooth. Add in the eggs, beating well after each addition. Mix together the flour, oats and baking powder. Add this to the creamed mixture, mixing well to make a smooth mixture. Add the vanilla essence and stir in until completely combined. Spoon the mixture into the cupcake cases and bake in the oven for approximately 25 minutes, or until a skewer inserted in the middle comes out clean.

When the cake comes out of the oven, use a skewer or sharp knife make small slits in the cupcakes. Pour over the whiskey, allowing time for the liquid to sink into the cakes. Leave to cool for 10 minutes before removing from the tin and allowing to cool completely. Use a small knife or a cupcake corer to remove the centre of each cupcake ready for filling.

Make the raspberry compote by reducing down the sugar, whiskey and raspberries in a small pan until the mixture is thick. Strain through a sieve to remove the seeds and taste, adding more sugar as you feel necessary. Once it is sufficiently thick (you want it to be the consistency of raspberry jam) then spoon a small amount of the mixture into the centre of each cupcake.

[Cheat: You could use raspberry jam instead of the compote if preferred  -just ensure you choose a good brand!]

Whip up the cream, icing sugar and whiskey together for the topping, ensuring that it is really thick and creamy. Pipe the cream onto the top of each cupcake, before decorating with freeze-dried raspberries and rolled oats.

Baking · History of Cake · Vegan

The Great Ancient World’s Bake Off – Rome vs Greece

The two contestants stood behind their benches, their stone ovens and fires at the ready. This challenge was going to determine their future, and the question of which country would win the baking crown. The competitors stood in silence – the time for trash talk was over. As the judges stepped forward, the bakers apprehension rose; what would they be asked to make in this challenge?

Terra cotta oven from Pompeii on display in th...
Terracotta Oven from Pompeii

The baking battle between the Ancient Romans and Greeks was at full throttle at present and tension was rife in the kitchen. The Roman competitors consistently mentioned their baking guild, how it was considered so important in their country that a member of the baking guild was asked to sit in on the Senate! They viewed the Greek baking cuisine as far less advanced – they didn’t even grow their own wheat flour, but had to import much of it from Sicily and Egypt. Not to mention most of their cakes were created for sacrifices – what a waste! However, the final was approaching, and it was between a Greek and a Roman – he had a chance to win this!

It had been a tough day. The signature bake has gone well on the whole, both of them managing to complete a cheesecake of their choice. Chrysippus felt that his recipe for placenta, a cheesecake layered with honey and filo pastry had been received a little better than his competitors effort of honey-soaked goats cheese balls (no soggy bottom!), however the technical challenge of a honey cake has possibly gone slightly more towards his Roman competitor. However, it now all rested on the showstopper challenge.

The judges announced the challenge; to cook a cake of their choice, representing themselves and their culture. The time limit was set and the competition started. Both bakers ran to the oven and started preparing their ingredients. Mad thoughts ran through Chrysippus’s mind – would they think that his cake was too simple, especially considering that it didn’t require any baking? Had he played it too safe? Should he have used beer to leaven his cake, or was that too Egyptian in style? Was creating a traditional round cake too boring – fit for the temple but not for the competition? He quickly shrugged this thought off – if it was good enough for Artemis the Moon Goddess, it was good enough for the judges!

Ancient Greek Cake

The time had come – the time was up. The cakes were presented and tasted. Positive comments were given for both his cake and his competitor’s egg and honey enriched cake. Now all they could do was wait.

Chrysippus’s Recipe for Gastris

Ingredients:

Filling:

  • ½ cup golden raisins, soaked overnight
  • ½ cup dark raisins, soaked overnight
  • 1 cup almonds, soaked and blanched
  • 1 cup dried apricots, soaked
  • 8 tbsp honey
  • 1 tbsp olive oil
  • 2 cups hazelnuts
  • ½ cup walnuts, soaked overnight
  • 2 cups poppy seeds
  • 1 tbsp freshly ground black pepper
  • A splash of water

Crust:

  • 3 tbsp honey
  • 2 cups sesame seeds
 Instructions
In a medium pan, dry toast the poppy seeds on medium heat for 1 minute. Transfer the poppy seeds into a bowl before toasting the hazelnuts
Add all the ingredients for the filling in a blender, starting with the soaked dried fruits, then adding the almonds, walnuts and hazelnuts, then the honey and olive oil. At last, add the poppy seeds and the pepper. If the mixture gets too dry, add cold water, one tablespoon at a time. The mixture should not have a liquid consistency.
To make the crust, blend together the sesame seeds and the honey until the mixture is completely combined before dividing the mixture into two parts. Spread the first half on a parchment paper lined pan, add the filling on top, and press down to ensure an even covering.  Top with the remaining sesame mixture and refrigerate until completely set (at least a couple of hours).
Notes: To make this recipe completely vegan, substitute the honey for an appropriate sweetener.
Baking · Central America · Cupcakes · Nation Cake Challenge

Cuba: Cuba Libre Cupcakes

Flag of Cuba

With summer just around the corner, cocktail season is coming, and one of the most common would no doubt be the Cuba Libre (colloquially known as a ‘Rum and Coke’ – rather more boring). This highball cocktail like many is of debatable origin, suggestions including being invented by expatriates avoiding prohibition in the 1920’s to Bacardi’s flawed account that it was invented during the  Spanish-American War when an American general ordered this drink in Havana. Seeing how much he enjoyed it, his soldiers ordered a round, toasting the newly-freed country by shouting ‘¡Por Cuba Libre!’ (Issues have been raised with his account as the introduction of Coca-Cola to Cuba happened 2 years after the other events, however it still remains the official account.)

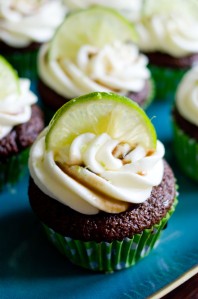
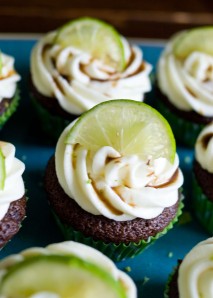
Whatever the origin though the cupcake still remains one of the most popular drinks around. This cupcake pays homage to this drink and includes a chocolate and Coca-Cola cupcake, flavoured with a little rum. The cupcake is filled with a dark chocolate lime ganache and topped with a rum-flavoured buttercream. The cupcakes are then decorated with a Coca-Cola reduction and topped with a slice a lime and some lime zest.

Cuba Libre Cupcakes 2

The cake recipe is taken from Coconut and Lime blog, from here.

Cuba Libre Cupcakes 1

Cuba Libre Cupcakes

Ingredients:

The cupcakes:

  • 8oz/225g plain flour
  • 8oz/225g sugar
  • 120ml Coca-Cola
  • 8oz/225g butter
  • 60ml milk
  • 3 tbsp cocoa powder
  • 2 tablespoons rum
  • 1 tablespoon lime juice
  • 1 teaspoon baking soda
  • 1 teaspoon baking powder
  • 1/2 teaspoon salt
  • 1 egg

The Lime Ganache:

  • 200g dark chocolate
  • 200ml double cream
  • zest of 1 lime

Rum Buttercream:

  • 80g salted butter
  • 275g icing sugar
  • 10ml milk
  • 10ml rum

Decoration:

  • 12 slices of lime
  • 30ml Coca-Cola
  • 1 tbsp caster sugar
  • lime zest, to finish

Instructions:

Preheat the oven to Gas Mark 5 and line a 12-hole tin with cupcakes liners. Melt the butter, Coca-Cola and Rum in a small pan and bring to the boil, before removing from the heat and allowing to cool. Mix the milk and the lime juice in a cup and leave for about 10 minutes – this will split and look disgusting, however it is correct, so trust me! Sift together the remaining dry ingredients and mix briefly before beating in the cooled butter/Coca-Cola/rum mixture. Beat in the egg and the milk mixture and mix to form a thin batter. Fill the cupcake cases to about 2/3rds full, and bake in the oven for 20 minutes, until an inserted toothpick comes out clean. Remove the cupcakes onto a wire baking rack and leave to cool completely.

Make the chocolate ganache by heating the cream to nearly boiling point, and pour over the dark chocolate, stirring until melted and combined. Add the lime zest and leave to cool. Remove the centre of the cooled cupcakes using either a cupcake corer or a sharp knife, and spoon a little ganache into the centre of each cake.

Make the buttercream by mixing the butter, icing sugar, milk and rum until light and fluffy – about 5 minutes with an electric mixture.  If it is a little thin, then add in a little more icing sugar. Transfer to the piping bag and pipe onto your cupcakes, ensuring the ganache-filled centre is covered.

Finally, reduce the Coca-Cola and sugar in the pan until it is thick and syrupy. Leave to cool and then drizzle over the top of your cupcake, before decorating with the slice of lime and the lime zest.

Enjoy, preferably set outside with an actual Cuba Libre.

Baking · Cupcakes

Raspberry and Coconut Muffins

More summery muffins? Check. Raspberries and coconut. That’s right. One of my favourite combinations makes up these beautiful muffins – a coconut cake, filled with raspberry compote and topped with a raspberry buttercream. If you liked the coconut dream cake, you’ll love these!

Raspberry and Coconut Muffins

Raspberry and Coconut Muffins

Ingredients:

Cake

  • 8oz butter
  • 8oz caster sugar
  • 4 eggs
  • 1 tsp vanilla essence
  • 4oz plain flour
  • 4oz dessicated coconut
  • 3 tsp baking powder

Filling:

  • 2 punnets of raspberries
  • 1 tbsp caster sugar

Buttercream Topping

  • 160g butter
  • 500g icing sugar
  • 40ml milk
  • Fresh raspberries, to decorate
  • Dessicated coconut, to decorate
  • Other decorations as required.

Instructions: Preheat the oven to Gas Mark 5 and line a 12-hole cupcake tray with liners. Cream together the butter and sugar before beating in the eggs and vanilla essence. Stir in the baking powder, plain flour and desiccated coconut and mix until well combined. Spoon into the cupcake liners and bake for 30 minutes until form and golden brown. Remove, place on a wire rack and leave to cool. Make the raspberry compote by placing the raspberries and sugar in a pan, and gently cooking until thick and the raspberries have broken down. Leave the mixture to cool. Use a cupcake corer or sharp knife to make a small hole in the cupcake before filling with the raspberry compote (or jam), retaining half the mixture. Make the buttercream by beating the butter, sugar and milk until thick and fluffy (about 5 minutes). Add in the reserved raspberry compote and beat until well combined. Spoon into a piping bag fitted with a star-shaped nozzle and pipe onto the cupcakes. Decorate with the raspberries, coconut and other decorations.

Baking · Bread

Provence: Olive and Rosemary Fougasse

Flag of France

I found out how to make bread rise! This may not sound like much, but this has been a major issue for me recently – there just isn’t anywhere warm enough in my house! However, thanks to a tip-off, I found that by turning my oven to Gas mark 4 for 5 minutes and then turning off, enough heat is generated to all my bread to rise! Result!

Fougasse 2

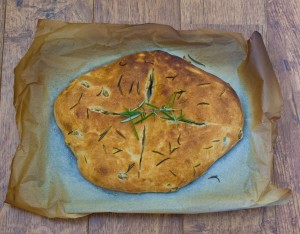
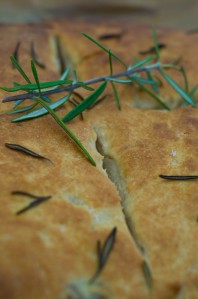
This recipe is another from the cookbook of Le Cordon Bleu, and is for a delicious, flat loaf flavoured with rosemary. (The original recipe calls for thyme, but I had fresh rosemary in the garden and just couldn’t resist! The fougasse is a form of flat bread baked in a wood-fired oven, and was used to check the temperature of the oven was correct. Fougasse is from Provence, and often includes other ingredients such as cheese, olives and anchovies. The Italian foccacia is from the same family of breads, and is made in a similar way.

Fougasse 1

This bread is simple to make, and great for summer picnics and outdoor meals as it has quite a dense texture which doesn’t crumb easily. Just be warned – it is very moreish, and won’t last long!

Olive and Rosemary Fougasse

Ingredients:

  • 300ml warm water
  • 15g yeast
  • 500g strong plain flour
  • 5g salt
  • 30 ml olive oil
  • 60g olives, stoned and sliced
  • 60 ml olive oil
  • 1 tbsp Salt
  • 2 sprigs fresh rosemary, chopped

Instructions:

Make your starter dough, by dissolving the yeast in the water, before adding 120g of strong plain flour. Mix briefly before covering and leaving in a warm place until doubled in size.

Place the remaining flour in a bowl and make a well in the centre. Add the salt, 50ml of water, olive oil and the olives before mixing in the starter dough. Start to knead the mixture until all the flour is incorporated, before shaping into a ball and scoring with a large cross. Again, cover and leave in a warm place until i has risen to double its original size.

Preheat the ovento 445°F/230°C/Gas Mark 8 and line a baking sheet with parchment paper. Roll the risen dough out to about 4cm thick and place on this sheet. Cut slits in the dough, pulling slightly to create a gap in the dough. Brush the dough with olive oil and sprinkle over the salt and rosemary. Bake about 35 minutes until golden brown (cover with foil if it starts to burn)