Baking · Cupcakes · Europe · Nation Cake Challenge · Travelling

Slovakia: Chai Maple Cupcakes

Sometimes the simplest thing can transport you back to a place; a sound, a smell, a taste. It may be something you experienced throughout a holiday, or it maybe something new, something that from that point on becomes inextricably linked to that moment.

20140119_150410_resized

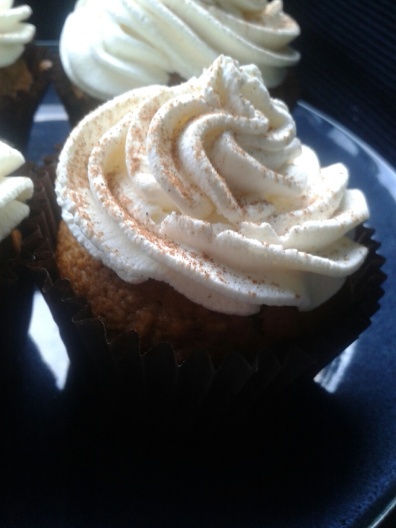
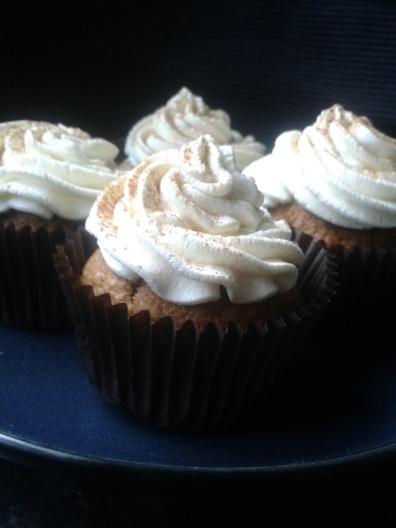
A few days ago I wrote about a recent trip to Bratislava, and my fondness for the cafe Urban Space. I’ve talked enough about the cheesecake, but today I’m going to embellish a little more about my beverage of choice – the Maple Chai Latte. I love this drink. Enough said. In fact I loved it so much, I decided that I needed to make it into a cupcake, that being the ultimate accolade for any foodstuff.

20140119_150219_resized

This recipe was adapted from Naturally Ellathough with a couple of minor changes. These changes were borne out of necessity but still worked well. Primarily I used whole spices as opposed to powdered spiced. I also added some vanilla to the whipped cream rather than the maple to add a contrast. They also went down well with Max who liked it far better than the initial Maple Chai latte (not his favourite drink…) Success all around!

Maple Chai Latte Cupcakes

Ingredients:

Chai Mixture

  • ½ teaspoon cinnamon powder
  • ⅛ teaspoon ground clove
  • ⅛ teaspoon ground cardamom
  • ¼ teaspoon ground ginger
  • 1 whole star anise
  • ⅛ teaspoon ground black pepper
  • 2 black tea bags
  • ¼ cup butter
  • ¼ cup + 2 tablespoons maple syrup
  • ¼ cup 2% or whole milk

Cupcake Batter

  • ¾ cup unbleached flour or whole wheat pastry flour
  • ¼ teaspoon baking soda
  • ¼ teaspoon baking powder
  • ⅛ teaspoon sea salt
  • 1 large egg

Whipped Cream

  • 1 cup whipped cream
  • 1 tsp vanilla extract
  • 2 tbsp icing sugar

Instructions

In a small pot, combine spices, tea bags, butter, maple syrup, and milk. Bring mixture to a simmer, letting butter melt, and once everything is melted together and warm, remove from heat and let cool for 10-15 minutes. After, remove star anise and tea bags, making sure to squeeze any remaining liquid from the tea bags.

Preheat oven to 350˚ and line a muffin tin with 6 liners. Whisk the egg and then add the flour, baking soda, baking powder, and sea salt. Stir in the cooled chai mixture and mix until just combined. Divide batter into the muffin tin and place in the preheated oven. Bake for 18-20 minutes until an inserted toothpick comes out clean. Remove from oven and let cool for 5 minutes. Transfer muffins out of the tin to a rack and finish cooling.

Once muffins are cool, whip the cream, icing sugar and vanilla extract together. Pipe the whipped cream onto the cupcakes and sprinkle with a bit of cinnamon to serve.

Baking · Cake · Nation Cake Challenge · North America

Hawaii: Pineapple, Coconut and Blueberry Upside-Down Cake

As an American state slap-bang in the middle of the Pacific Ocean, Hawaii is a complete contrast to the rest of mainland America (My lack of geographical knowledge in my younger years becomes painfully evident when discussing the Pacific – until I was 11 I thought that Hawaii was somewhere in the Caribbean!). This tropical paradise (Paradise incidently being one of the archepeligo’s nicknames) enjoys ideal conditions for people from sun-seeking tourists to thrill-seeking surfers and volcanologists. Sadly it has one major issue, in that it is about as far as Britain as possible, therefore making a holiday rather impractical.

I plan to visit Hawaii at some point during my life, and at present the dreams of this island make the grey British January weather rather more bearable. When I walk down the cold, dark roads, I picture myself in Hawaii, eating pineapples (the island’s biggest crop), swimming in the warm sea and generally getting the sun I can’t seem to find at the moment!

pineapple upside down cake

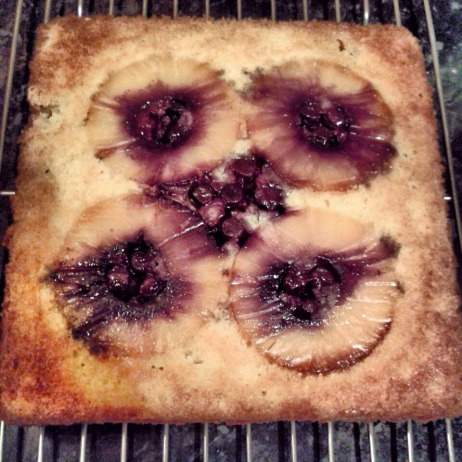
The main aspect of this delicious cake, the pineapple is a major export of Hawaii. Whilst it originated in South America, it was introduced to the islands in the early 1990’s, quickly gaining massive popularity. The two largest pineapple companies (Dole and Del Monte) first started their companies on Oahu (the largest albums) and Hawaiian pineapple is still a massive corner of the market to this day. Combined in this delectable cake is the intensely tropical coconut and some added rum and blueberries to give some extra colour and intensity. Eat this cake and you will forever forget the pineapple upside down cakes of yesteryear.

The recipe was taken from  London Bakes (here)

Pineapple, Coconut and Blueberry Upside-Down Cake

Ingredients:

  • 500g fresh pineapple (canned will do at a push, but fresh is so much better!)
  • 20g fresh blueberries
  • 50g unsalted butter
  • 2 tbsp caster sugar
  • 100ml coconut milk
  • 50g dessicated coconut
  • 1 tsp vanilla extract
  • 30ml rum
  • 165g unsalted butter, softened plus more for the tin
  • 200g caster sugar
  • 2 eggs
  • 185g plain flour
  • 1 1/2 tsp baking powder

Instructions:

Preheat the oven to 175F.  Line a tin with parchment paper and grease well with butter. Don’t use a springform tin unless you want to spill hot syrup all over yourself…

In a saucepan, heat the coconut milk until boiling, before taking off the heat and stir in the dessicated coconut, vanilla and rum.  Leave to cool whilst you prepare the pineapple.

Cut the pineapple into thin slices (if using canned, then just drain the slices slightly).  Melt the butter and sugar in a frying pan and, when hot, add the pineapple slices and caramelize on each side (this will take about 3 minutes on each side). Remove from the heat, allow to cool and place the pineapple in a layer at the bottom of the cake tin.  Pour over the syrup from the pan.  Add the blueberries to the gaps between the pineapple slices.

To make the cake, beat together the butter and sugar until light and fluffy.  Beat in the eggs one at a time until combined and then fold in the flour, baking powder and coconut mixture. Pour into the tin and bake for 25-30 minutes until a toothpick comes out clean and the top is golden brown. Cool in the tin for 15 minutes, then turn out onto a wire rack, carefully peeling off the parchment paper to expose the fruit topping.

Serve with ice cream or cream.

Travelling

Bratislava – the Queen of (Cheese)Cake

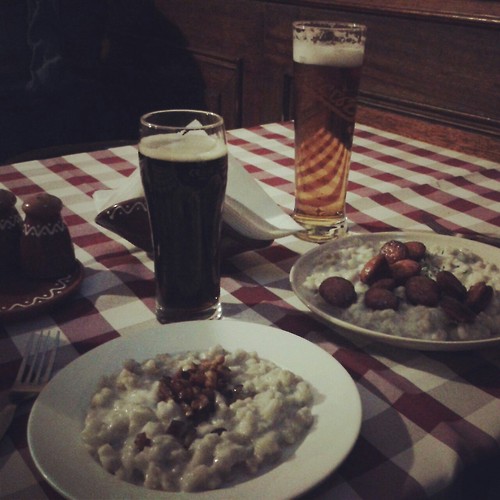
Over Christmas, we went to Bratislava and Vienna for a couple of days which was lovely, and a very well deserved break! Now, during this trip we saw some rather unique things, including a church designed by Cinderella, an aptly named UFO bridge and some of the heaviest food I have ever eaten! (Yes halusky, I’m looking at you!)

cinderella churchCinderella’s Church

ufo bridgeThe UFO Bridge

HalachyHalusky (In a very dark pub – this is actually lightened up!)

However, the culinary highlight of this trip, has to be the discovery of my new favourite cafe, which I now want to visit again, despite the distance. This cafe, Urban Space is one of my favourite styles – mismatched chairs, lots of books (its actually in a bookshop) and lovely cakes and drinks – frankly I could sit there all day!

Now my first discovery was the wonderful maple chai latte – having just discovered the deliciousness of chai lattes, I started drinking these with regular frequency! However good this was though, it was completely eclipsed by the cheesecake.

chesnut cheesecake

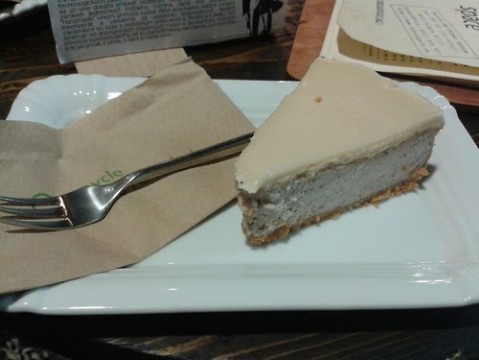
This is chestnut cheesecake. This was very good. However, this next dessert even pushed this delicious dessert in to the shadows.

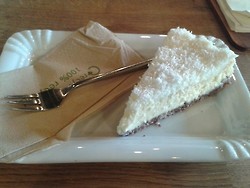
Coconut cheesecake

This coconut cheese cake may be the most delicious cheesecake I have ever tasted in my life. Words cannot describe it and I fear that I may spend my whole life searching for this cheesecake. Oh my.

This was a culinary highlight. It also completely wiped the board with any cakes we tasted in Vienna – granted we didn’t manage to go into Cafe Sacher, but the queue was out the door! However, purely on this basis I would offer this advice. Go to Bratislava, visit Urban Space and never leave. Curl up with a maple chai latte, a piece of cheesecake and enjoy a little piece of Central European heaven.

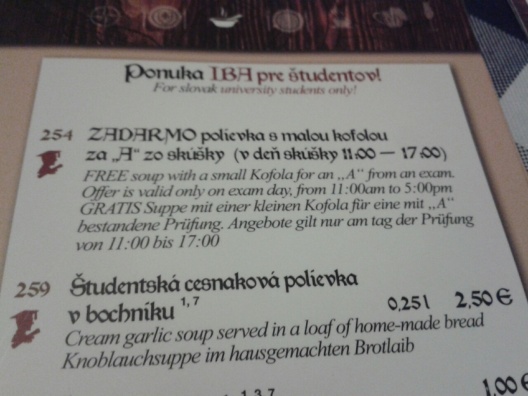
Also apparently this is my 100th post, so I will celebrate this with some menu comments from this holiday. I love Bratislava.

20131230_151008_resized

Exam success – get free soup!

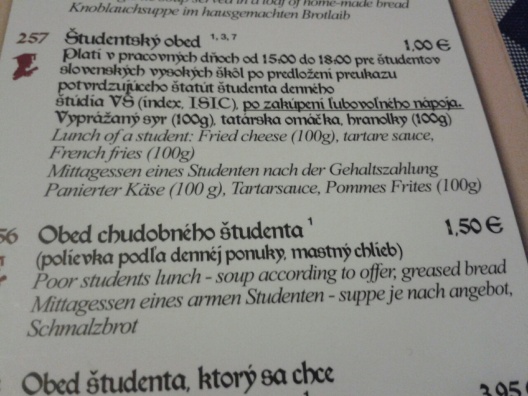
20131230_151035_resized

Not sure it’s my preferred student lunch…

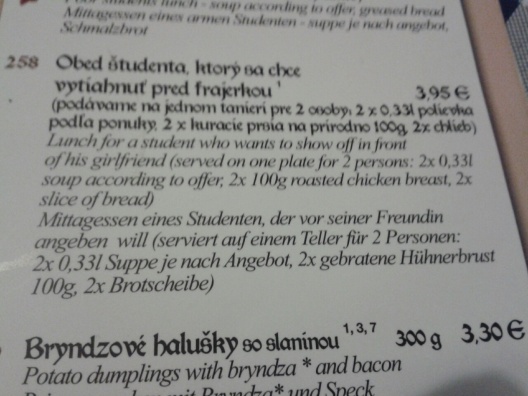
20131230_151021_resized

And to finish, Bratislava may be the most supportive city ever. I love this.

Baking · Desserts

Chocolate Chestnut Pavlova (A Holiday Miracle)

This year, I was allowed to cook dessert for Christmas Day. Now this is a big honour in our house, my dad guards the kitchen zealously, and it is very unusual for him to allow cooking rights to anyone else! This pressure is high as well – he does an amazing Christmas lunch and dessert has to live up to it!

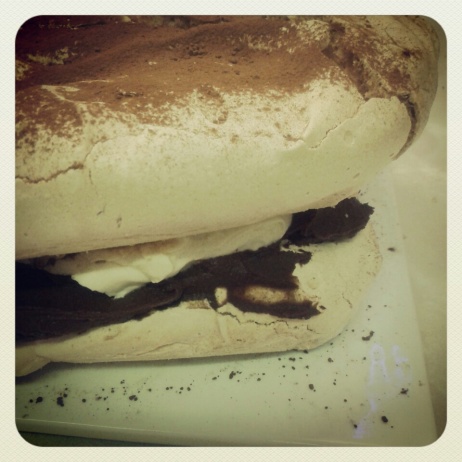
This then was my creation, a decadent chocolate chestnut pavlova. One of my favourite combinations, this delectable dessert was a fitting centrepiece, converting even the meringue-haters amongst the diners – thus providing a holiday miracle!

IMG_20131225_154035_resized

 This may be completed in a variety of styles – I made a two layer rectangular pavlova, sandwiched with the cream and ganache filling. However, you could also make a smaller three-layered circular pavlova – whatever floats your boat really!

 Chocolate Chestnut Pavlova

 Ingredients

  •  4 egg whites
  • 115g caster sugar
  • 115g icing sugar
  • 150g dark chocolate
  • 200g double cream
  • 50g chestnut puree
  • 100g double cream
  • 20g icing sugar
  • Cocoa powder, to decorate

 Instructions:

Preheat the oven to gas Mark 2. Line two baking sheets with baking parchment and draw three 10-in circles on the parchment. Please don’t use pen – ink and meringue is not a flavour combination I would particularly endorse…

In a scrumptiously clean bowl, whisk your egg whites until they form soft peaks. Add in the sugars, a spoonful at a time until it has all been incorporated and the mixture forms stiff peaks. Spoon the mixture onto the preprepared baking trays, doing your best to stay within your pencil-drawn lines! Use a fork to create a jagged top to one of the meringue circles – the extra peaks will give a greater surface area to create the lovely caramelised sugar topping, and add a delightful golden colour to the top of your pavlova.

Turn the oven down to Gas Mark 1/2 (basically as low as it will go!) and bake your pavlova for 1 hour 30 minutes until the layers have a crisp top, a light gold colour and slightly darker points. Remove from the oven, cover with a tea towel and leave to cool completely overnight.

The next day (a few hours before you want to eat it), make the chocolate ganache by melting together the chocolate and chestnut purée. Add the double cream and mix until completely combined. Leave in a cool place for at least 30 minutes, preferably longer until doubled in thickness.

To assemble the final dish, start by whipping the cream and icing sugar together until it forms a soft mass of whipped cream. Place the bottom layer of meringue on a serving plate and then alternate layers of ganache, cream and meringue, ending with the top layer you made earlier. Finish with a final dusting of cocoa powder, and serve in big, delicious wedges.