Baking · Cake · Cupcakes

Chocolate Mint Cupcakes

When I was younger, I used to go to orchestra on a Friday night, held up at the local high school (later to be mine). In between junior and intermediate orchestra, the parents association used to hold a tuck shop, selling chocolate bars and pick’n’mix sweets to hungry string players. This stall, formed of three school tables provided me and my brother with our weekly treats – we were given some money and were able to buy sweets for the following week. Now early on, I would choose white chocolate mice – something I still associate with being very small, but soon moved onto mint imperials. The reason? Quantity – you would get 10 for the price of 5! I was too young to completely understand the concept of bulk buying, but I knew I wanted as many sweets as I could get for my money! And thus began my affection for mint.

Fast forward a few (a lot) of years to Sixth Form college, and we discovered the local ‘Home Bargains’ store, particularly the confectionary section. It was here that I got introduced to Poppets (peppermint creams covered in dark chocolate) and it was here that my liking for mint developed into an obsession for mint chocolate. Even now, I cannot say ‘no’ to an After Eight, and woe betide the person who leaves a box in front of me…

choc mint buns

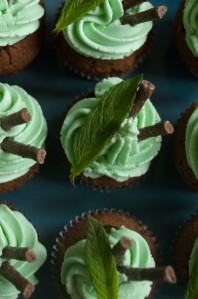
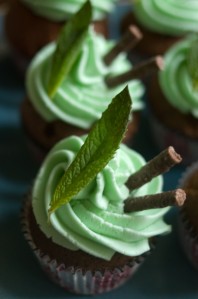
These cupcakes are based on this favourite flavour combination and combine a dark, dense chocolate-peppermint cake, with a mint infused chocolate ganache and a mint-flavoured buttercream. Decorate with mint matchmakers (if they last long enough) and enjoy, after eight or indeed at any time.
chocolate mint buns

Chocolate Mint Cupcakes

Ingredients:

Cupcakes:

  • 4oz butter, softened
  • 4oz caster sugar
  • 2 eggs
  • 4oz plain flour
  • 1.5 tsp baking powder
  • 2 tbsp cocoa powder
  • 1 tsp peppermint extract (optional)

Chocolate Mint Ganache:

  • 100ml double cream
  • 10 mint leaves
  • 100g dark chocolate

Chocolate Mint Frosting:

  • 250g icing sugar
  • 80g softened butter
  • 20ml whole milk
  • Peppermint extract
  • A few drops of green food colouring
  • 2 tbsp cocoa powder

Instructions:

Preheat the oven to gas mark 5/190°C/375°F and line a 12-hole cupcake tin with bun cases. Set aside for later.

To make the cakes, cream together the butter and sugar until pale and fluffy. Add the eggs one at a time, eating after each addition. Add the flour, baking powder, cocoa powder and peppermint extract and beat until smooth. Spoon the mixture into the bun cases and bake in the preheated oven for 25 minutes until an inserted skewer comes out clean and the tops are firm to the touch. Set aide to cool completely.

Whilst the cupcakes are cooling, make the chocolate mint ganache. Heat the cream and the mint leaves until the cream starts to boil. Immediately remove from the heat and take out the mint leaves, before pouring the hot cream over the broken dark chocolate. Stir until all the chocolate has melted and then leave to cool. Using a cupcake corer or a sharp knife, remove the centre of each cupcake and spoon a small amount of the chocolate ganache into each hole.

Make the buttercream icing by beating together the butter and icing sugar until thick and fluffy, adding the milk to bring the mixture together. The mixture will take about 5 minutes to become thick and fluffy – if you have a stand mixer this is very useful! At this point, divide the mixture into two halves. Add the cocoa powder to one portion of the buttercream and beat thoroughly to combine. To the second portion, add the peppermint essence and the green food colouring and beat thoroughly.

To make the two-tone icing bags, fill two icing bags, one with the mint buttercream and one with the chocolate buttercream. Cut about half and inch off the end of each, and place both bags into a third bag with a large star-shaped nozzle on the end. Try out the duo-bag on a spare cupcake, to ensure that it does not have any trapped air bubbles that may disrupt the flow, before using it to top your cupcakes. Decorate with chocolate decorations as wished

Baking · Cookies

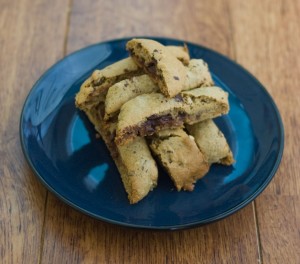
Cappuccino Biscotti with Chocolate Chips.

Rachel:

‘Look look look look look! My first paycheck. Look at the little window. There’s my name. Hi, me! Isn’t this exciting! I earned this. I wiped tables for it, I steamed milk for it, and it’s – not worth it. Who’s FICA? Why is he getting all my money?

[Friends, Series 1 episode  4]

Now regardless of the amount of money you earn, I’m sure we’ve all felt like this when looking at our paychecks – not complaining about the pay itself, but having the sudden realisation that being quoted a certain salary doesn’t mean you actually get all that money. In my case, I sat down to work out what would be taken off and due to some bad arithmetic on my part ended up panicking that I didn’t actually have enough money to live!

These biscuits are a good thing to make when times are feeling particularly hard, as the majority of the ingredients you will be likely to have in the house already, especially if you are a regular baker. They are very quick to make, and last a long time if stored correctly so will help you in those times when you need something sweet but the bank balance is saying ‘No’!

Coffee and Chocolate Biscotti

The recipe is taken from one of my funniest cookbooks ‘Cooking With “Friends”‘, a present from my dad who found it in the local charity shop. For those ‘Friends’ afficionado’s amongst us, it gives you recipes for Phoebe’s oatmeal and raisin cookies, Nora Bing’s Kung Phao Chicken and George Stephanopoulos’s pizza (I will be very happy if there are other people out there who get all these references!) This recipe for biscotti is taken from a section on Central Perk, and if they serve these, then I would also be there all the time!

Cappuccino Biscotti with Chocolate Chips

Ingredients:

  • 2 cups plain flour
  • 1 cup caster sugar
  • 1/2 tsp ground cinnamon
  • 1/2 tsp baking powder
  • 1/2 tsp baking soda
  • 1/2 tsp salt
  • 2 tbsp milk
  • 1/4 cup strong black coffee
  • 1 large egg yolk
  • 1 tsp vanilla extract
  • 2/3 cup whole almonds
  • 1/2 cup dark chocolate chips

Instructions:

Preheat the oven to 375°F. Add the flour, sugar, cinnamon, baking powder, baking soda and salt to a bowl and briefly mix. Stir the milk in the coffee before adding the vanilla extract and egg yolk. Mix well then add to the dry ingredients and stir to make a smooth dough (add a little more milk if necessary). Stir in the nuts and chocolate chips.

Line a baking sheet with paper. Roll half the mixture into a log, place on the baking sheet and repeat with the other half of the mixture. Bake for about 20 minutes until firm to the touch, but not completely cooked. Remove from the oven and reduce the temperature to 325°F. Cut the logs into slices 3/4in wide and place on their side on the baking sheet. Return to the oven and bake for another 10-15 minutes until crisp.

Stored in an airtight container, these will keep for at least a week.

Baking · Cake · Europe · Nation Cake Challenge

Serbia: Vasa’s Torte

Flag of Serbia

In terms of national cuisine, we talk a lot about heterogeneous cuisines, or cuisines that have developed from centuries of rule or habitation by peoples who are not part of that country from birth. This is particularly prevalent in Balkan countries, as up until comparatively recently these countries were ruled by others, part of a larger union of countries. Unsurprisingly this impacts on the food – influences can be taken from many countries can be seen even today. This is particularly true of this cake – one that takes much of it’s style from the Austrian gateaux which would have been known to Serbia during it’s time of Austro-Hungarian leadership.

Serbian Cake

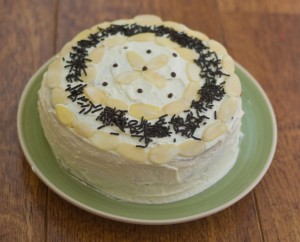
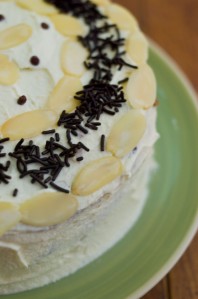
This cake is a very traditional Serbian cake, with the flavours of chocolate, almonds and orange. The cake is a very light cake, held up primarily by egg white rather than raising agents. This is then topped with a chocolate almond topping, and the whole dessert is covered with whipped cream.

Serbian Cake 2

I have toned down the amount of cream in this cake; the picture below shows a traditional cake, but I could not face the sheer amount of whipped cream! Feel free to increase the amount if you so wish!

File:Vasina torta.jpg
A Traditional Vasa’s Torte

Vasa’s Torte

Ingredients

For the cake

  • 5 eggs
  • 5 tablespoons caster sugar
  • 6 tablespoons walnuts (ground, or almonds)
  • 1 tablespoon flour
  • 1 juice of oranges

For the filling and topping

  • 250 grams walnuts (ground)
  • 4 egg yolks
  • 5 tablespoons caster sugar
  • 150 grams butter (soft)
  • 50 grams dark chocolate (grated)
  • 0.2 litres milk
  • 1 orange
  • 300 ml double cream

Method

  1. Preheat the oven to 180 °C/350 F/Gas 4.
  2. Grease and base line 23 cm/9in round cake tin with greased greaseproof paper.
  3. In a bowl whisk together the egg yolks and caster sugar until pale and fluffy.
  4. Add walnuts and flour and combine all. In another clean bowl whisk egg whites to the stiff peak stage and carefully fold them into the egg yolk mixture, bit by bit, using a metal spoon.
  5. Now pour the mixture into the prepared cake tin and bake it for about 30 minutes.
  6. When it is baked, leave it to cool and than transfer to serving plate. Pour orange juice over cake and prepare the filling. For the filling melt chocolate and cool a little.
  7. In a saucepan put milk and 1 tablespoon sugar and heat it to boil and then pour over ground walnuts and mix well.
  8. Add melted chocolate, grated zest and juice of orange and combine all.
  9. In separate bowl whisk egg yolk and sugar until pale and add to chocolate mixture and finally add butter and mix well.
  10. Spread the filling over the cake, it will be thick like one layer of cake.
  11. Chill in the fridge for about 2 hours.
  12. Then whip the cream and spread over and around the cake.
  13. Can be decorated with grated chocolate.
Uncategorized

Feast With Yeast: The Ancient Egyptian Contribution to Baking

After last week’s neolithic oatcakes, we will be moving into the slightly more conventional field, and introducing you to arguably the most important people in the field of baking – The Ancient Egyptians. Why are these people the most important, you might ask? Well, the ancient Egyptians are the first recorded people to have made use of a leavening agent (in this case, yeast).

The addition of yeast is probably the most important event in the development of cakes as prior to this, cakes did not rise. Without a leavening agent cakes (and breads for that matter) were flat, crispy and very un-cake-like! The addition of yeast meant that for the first time a product recognisable as modern-day cakes and breads was available. As an aside, it also led to the invention of beer, a side product of the original baking process. The first large-scale bakeries were also seen, as seen in the painting below, taken from the tomb of Ramses III

A depiction of the royal bakery from an engrav...

Rather than kneading the dough, the Egyptian bakers would tread repeatedly on it (Top left hand corner of the picture). Not sure about that technique – I think I’ll stick to  hand kneading… 

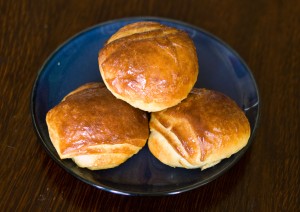
At this point, bread and cake were still heavily intertwined, the terms often used interchangeably. The term ‘cake’ was used to describe a small bread roll, though one that would often be sweetened, with seeds and dried fruit added to create a more special cake. Honey was often used for a sweetener, but as this was an extremely expensive product, cakes of this nature would only be made for extremely wealthy people. For those with less money, dates or carob could be used as less expensive option.  As these small sweet ‘cakes’ were made almost exclusively for the richer echelons of society, care was taken with presentation. Some were formed into spirals, others made in the form of cows, whilst others could be dyed red to resemble roast meat – each to their own! Feel free to try one of these decorative techniques with this recipe if you wish by adding red food colouring and shaping into the form of a meat of your choice. I think I will just stick to the snail spirals.

Egypt buns

Ancient Egypt Style Honey Bread-Cakes Ingredients:

  • 50ml milk
  • 150ml hot water
  • 1 tbsp dried yeast
  • 500g strong plain flour
  • 70g butter
  • 50g caster suga
  • 10g salt
  • 2 large eggs
  • 100g runny honey

Instructions:

Firstly, make the dough by mixing together the water and milk in a measuring jug. Add the yeast and stir to dissolve before setting aside.

Place the flour in a large bowl and mix in 20g of the butter, rubbing the mixture until the texture resembles breadcrumbs. Stir in the sugar and salt before mixing in an egg. Finally add the yeast mixture and mix with a wooden spoon.

Turn the mixture out onto an unfloured surface and knead for 1 minute by stretching the mixture with both hands, lifting and slapping down, folding the ends to the middle. Leave to  rest for 15 minutes before continuing to knead for 5 minutes until if becomes very soft and pliable. Cover and leave to rise for 1 hour in a warm place.

Roll the risen dough into a rectangle 2cm thick. Chop the remaining 50g butter into cubes and place in the centre, before folding the dough into thirds by folding each end over the centre. Seal the edges with your fingers and roll out into a rectangle again. Repeat the folding process (minus the butter!) and set the dough aside to rise in a warm place for 1 hour. Repeat the folding and rolling, before allowing to rest for a final 30 minutes.

Cut the dough into 12 pieces and form it into 12 round buns. Place on a baking tray lined with baking paper, cover loosely with a towel and leave for 30 minutes for one final rise.

Brush with eggwash and bake in a preheated oven (Gas mark 6) for 20 minutes until golden. It may not traditional, but these are delicious served with butter and more honey.

[Additions: Include dried fruit or dates, chopped nuts or seeds – put your ancient Egyptian hat on and go wild!]

Baking · Main Meals

Sleeping Beauty’s Sausage Plait

Imagine you are a Disney princess, something I’m sure many of us female readers did A LOT when we were younger. After having your finger pricked on an enchanted spindle, falling asleep for thousands of years and finally waking up to find some stranger kissing you, I would assume you’d want some pretty solid food! Not to mention the fact that you have to struggle through centuries worth of thorns growing around the castle, just to get out!

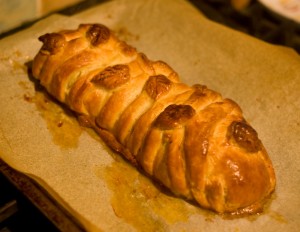
This is my take on Sleeping Beauty’s first meal – a substantial delicious and warming (abandoned for thousands of years, it’s going to get a bit chilly in there!) sausage plait. Quick to rustle up (particularly if you use the cheat suggestions provided, this will give her enough energy to sort out her life, in what I would assume is now some sort of futuristic dystopia that would make Enchanted look like a piece of cake, whilst the pastry thorn branches remind her that yes, it did just happen!

Sausage Plait whole

There are two ways of doing this: complicated and cheat. In the complex way, you make you own puff pastry and sausagemeat filling. In the cheats way, you use shop-bought puff pastry and remove the skins from a nice packet of good-quality sausages. This is the cheats way but can be easily adapted, including adding your choice of vegetarian stuffings.

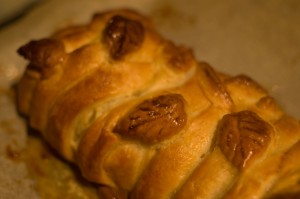
Sausage plait detail

Sleeping Beauty’s Sausage Plait 

Ingredients:

  • 1 sheet of puff pastry (recipe here)
  • 1 pack good quality sausages, skins removed
  • 1 small onion, finely chopped
  • A handful of parsley, finely chopped
  • Salt and pepper to taste
  • 1 egg, beaten.

Instructions:

Saute the onions in a small pan until softened. Mix the onions and sausagemeat together and season with salt and pepper. Add the chopped parsley and stir well to combine.

Line a baking tray with parchment paper and roll out the puff pastry to form a long rectangular sheet. Shape the sausage meat filling into a long roll and place in the middle of the pastry. Cut the edges of the pastry into strips and use these to form a basic plait, crimping any gaps with your fingers to ensure that there are no holes from which the juices could leak out. Use the remaining scraps to cut out leaves and stems to decorate the top with.

Brush with the beaten egg and bake for 30 minutes at Gas Mark 6 until golden brown and crispy If it starts to burn, cover with foil.

Desserts · Ice Cream

I Dream of… Chocolate and Raspberry Ice-Cream

I love ice-cream, very much. However, the problem with living in England is that our range of ice-cream flavours is not that exciting. Yes,  Cornish clotted cream ice-cream is delicious and there are some really delicious ice-creams out there (notably a delicious blackcurrant ice cream that is sold at National Trust properties), but on the whole it’s pretty pedestrian. Many of my holiday memories revolve around ice cream – a dreamy dark chocolate gelato in Dubrovnik, a celery flavoured ice cream in Rome and my first taste of Italy – a canteloupe melon gelato.

After our last holiday to Rome, and after many occasions of me mentioning how much I wished we could have the delicious flavours we sampled at home, I was bought an ice cream maker as a housewarming present. Now the first try of this was rather disappointing – the included recipes were rather lacking in flavour. However, I then bought possibly one of my favourite cook books, David Leibovitz’s The Perfect ScoopThis book is what ice-cream needed; the flavours in this book literally make my head spin with the possibilities.

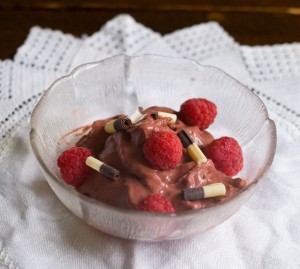
Chocolate Raspberry Ice Cream

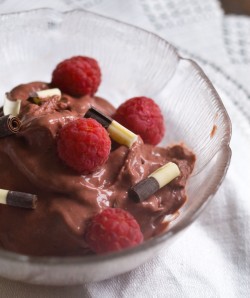
This ice cream was chosen to go with the Prinsesstarta made earlier in the year. Whilst not traditional to serve chocolate ice cream with it, the addition of raspberries to the ice cream gives a tart edge which contrasts well with the sweetness of the creamy cake. However, it is also delicious with fruit, cakes, scraped from the bowl… whatever floats your boat!

chocolate and raspberry icecream

[Note, home-churned ice cream will tend to be less set than the shop bought variety, and then set about a million times harder when frozen – remove it 10 minutes before serving which should make it easier to shovel out!

Chocolate and Raspberry Ice Cream

Ingredients:

  • 360ml double cream
  • 120g caster sugar
  • 40g cocoa powder, the best quality you can get.
  • 240g raspberries.

Instructions:

Place the cream, cocoa powder and sugar in a large saucepan and heat until it come to the boil, whisking regularly (it will start foaming up, this is normal). Remove from the heat and add the raspberries. Leave to cool for 10 minutes, stirring occasionally. Pass the mixture through a sieve to remove the seeds and refrigerate until chilled. Churn in your ice cream maker according to the instructions.

Salads

Lunchbox Success: Blueberry, Pecan and Feta Salad

As a school teacher, lunch is often a rushed affair to prepare – you want it to be relatively fresh by the time you eat it, but you don’t want to have to spend time preparing it in the morning. This is especially true if like me you are getting to work extremely early – You want as much time as possible to get prepared, not making a complex lunch. The go-to is often a sandwich, but I’m not a fan of basic sandwiches – either I buy a good one or I don’t eat it!

Salads would tend to be my preferred choice, but the choice can be a little constricted – the amount of times I’ve eaten a salad of lettuce, tomato and cucumber and olives. Not bad, but slightly pedestrian after the hundredth time. I’m always looking out for more interesting salads, and eating this one at a school function, I knew I’d found what I was looking for.

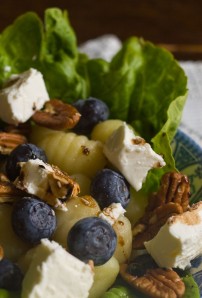
Blueberry, Feta and Pecan Salad

Blueberries and pecans contrast with the saltiness of the feta cheese and the tang of a balsamic reduction. Mixed in with lettuce of your choice this forms a delicious and unusual choice of salad for a lovely lunchbox. I have also bulked this out with potato gnocchi for a more substantial meal.

Blueberry, Pecan and Feta Salad

The recipe is deliberately vague – no-one likes measuring out ingredients first thing! Aim for equal amounts of all the ingredients and you wont go far wrong in constructing it.

Blueberry, Pecan and Feta Salad

Ingredients:

  • 1 handful feta cheese
  • 1 handful pecan nuts
  • 1 handful blueberries
  • 1 handful lettuce (mixed leaves work best)
  • 4 tablespoons balsamic vinegar
  • 1 handful potato gnocchi

Instructions:

Boil the potato gnocchi according to the instructions, if required. Wash the lettuce and blueberries and place in a bowl with the pecan nuts and chunks of feta cheese. Mix with the potato gnocchi. Reduce the balsamic vinegar over a low heat  and drizzle over the salad before serving.

Baking · Cake · History of Cake · Savoury Cakes

The 7,000 Year Old Cake

In the first of our series of posts on the historical development of cake, we are looking at Ancient history, going back 7,000 years to find the original source of cake. Get your time-travelling shoes on, step in the Tardis or turn over your time-turner and we’ll head back 7,000 years to the Neolithic Era and this particular settlement.

Clegyr Boia ancient settlement - geograph.org....

Unsurprisingly, it didn’t look like that in the Neolithic Era, but here is a more modern reconstruction of what it might have been like.

English: Skara Brae, Neolithic settlement, Ork...

This particular settlement is Clegr Boia in the north of Scotland, and it was in a settlement similar to this that the first items of a cake-like nature were discovered. Now bearing in mind that there was no leavening agent around at the time (the stuff that enables cakes to rise), the cakes were very different to what we think of now. Examples found were made of whole grains, crushed and moistened before being shaped into cakes and cooked on a flat hot stone. Produced today, they would be called oatcakes, and far from being a sweet, fluffy treat they would be a crisp, oat biscuit to be eaten with cheese. Not what we might want, but considering the resources available to these primitive peoples, it’s fascinating to see the roots of our now-common cake.

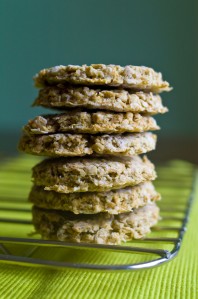
Oatcakes 1

Next week, we will move forward some years to meet with the Ancient Egyptians and introduce you to the innovations that made modern cake-making possible, whilst getting ready to meet the competitors of the Great Ancient World’s Bake-Off – the Ancient Greeks and Romans. Meanwhile, here is a recipe for oatcakes, which whilst using modern techniques (such as an oven) will still help to give you a taste of the Neolithic Bakery.

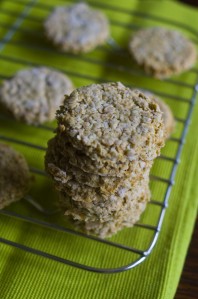
oatcakes 2

Neolithic-Style Oatcakes

Ingredients:

  • 225g oats
  • 60g flour (wholewheat is more traditional but plain flour will do)
  • 1/2 tsp bicarbonate of soda
  • 60g butter
  • 1 tsp salt
  • 1/2 tsp sugar
  • 60-80ml warm water

Instructions:

Preheat the oven to gas mark 3. Mix together all the dry ingredients before adding the butter in pieces to create the texture of coarse breadcrumbs. Add the water slowly until a thick dough is formed (this may take some or all the water, depending on the oats used – as long as it’s not too loose it should be fine). Sprinkle the work surface with oats and flour and roll out the mixture to a thickness of about 0.5 cm. Cut out the oatcakes using either a cutter or using a sharp knife and bake for 20-30 minutes until golden brown and firm.

Serve with cheese or pate.

[It seems very different from our idea of cake, but it is worth remembering the alternative meaning of the word cake – a firm, compacted mass, such as a cake of soap. Whilst meanings can change, the roots are still there.]

Baking · Cake · Europe · Nation Cake Challenge

France: The Great Madeleine Debate

Flag of France

Though looking small innocent and thoroughly innocuous  these small fluffy desserts have been the centre of one of the fiercest debates in baking history – are madeleines a cake or a cookie? This is the type of argument that results in a messy kitchen and flour fights, but as never satisfactorily been resolved. Martha Stewart is the principle leader of the cookie brigade, whilst the French chefs at Le Cordon Bleu stand firmly on the side of cake. In this [imaginary] debate between leading chefs, I would have to side with the French – They are definitely a cake! My judgement is very simple – cakes = soft, cookies – crunchy. Madeleines are not  crunchy so therefore they are cake.

Where do you stand on the whole cake/cookie debate? Answers on a postcard please (or in the comment section…)

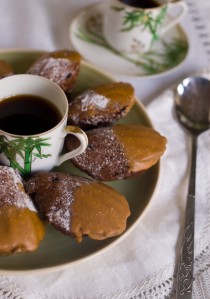
madeleines 3

For a cake that has caused huge culinary disagreement, the madeleine supposedly has a very humble origin being developed by a poor french farmer named (you guessed it!)… Madeleine. However, it shot to fame in later years when the king came by, ate the cakes and loved them, taking the recipe and naming them after the original creator. The madeleine was also used by Proust to discuss the difference of voluntary memory (where memories are the result of an effort to create them) and involuntary memories, describing an event where the narrator bites into a madeleine and is instantly transported back to a memory from his childhood. In the spirit of philosophy, I then invite to to take a bite of a madeleine and see what involuntary memories come back to you.

madeleines 2

[For your information, the involuntary memories that came back to me was the Friends episode with the male nanny, and Rachel saying ‘Sandy made madeleines!’ Not exactly deep or thought-provoking!]

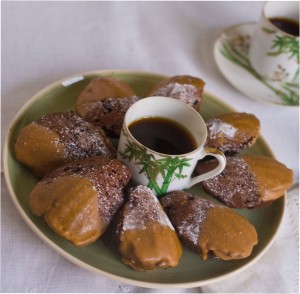
Mocha Madeleines

Madeleines

  • 3 large eggs
  • 4oz/125g caster sugar
  • 1/2 tsp vanilla extract
  • 150g plain flour
  • 1 tbsp cornflour
  • 32g cocoa powder
  • 1/2 tsp baking powder
  • 1 tbsp instant coffee powder
  • 1/4 tsp salt
  • 4oz/110g melted butter

For the glaze

  • 187g icing sugar
  • 45ml brewed coffee
  • 1/2 tsp instant coffee powder

Instructions:

In a medium bowl, whisk together flour, cocoa powder, baking powder, instant espresso powder and salt. Set aside. In a separate bowl, beat eggs, granulated sugar, and vanilla with a mixer on medium speed until frothy. Fold the flour mixture into the egg mixture using a rubber spatula. Fold in the melted butter until incorporated. Refrigerate the batter for at least two hours or overnight.

Preheat oven to 375°F/190°C/Gas mark 5 and butter the madeleine pan. Fill each madeleine tin with 1 tablespoon batter. The batter will be stiff, but it will spread as it bakes. Bake for 7-8 minutes until an inserted cocktailstick comes out clean. Immediately turn the madeleines out onto a wire rack. If baking the madeleines in batches, wash the pan, dry it thoroughly, butter the tin again, fill them with batter and repeat the baking process.

To make the glaze, dissolve the coffee powder into the brewed coffee, before whisking in the icing sugar. Once the madeleines are cool, dip them at an angle into the glaze and place on baking parchment to dry.

Baking · Cake Decorating · Cupcakes · Europe · Nation Cake Challenge · Sugar Flowers

Estonia: Rhubarb, Rose and Cardamom Cupcakes

Flag of Estonia

The development of a national cuisine is an ever-changing process. It is affected by many things, from global climate issues to historical events, all of which can drastically change the food that is eaten by a national people. Estonia is a clear example of this; the elimination of much of the culinary leaders during the USSR annexation of 1940 resulted in a country viewing food simply as a way of survival. Food was scarce, both the variety of foods available, but also the amount of food. The many restaurants were either shut down completely or reopened, providing Soviet cuisine. As a result, traditional Estonian food became less and less usual. Alongside this ran an influx of new culinary influences through the many displaced immigrants from other eastern Europen countries, who all played their part in adding a great amount of diversity to the existing culinary minds. After the annexation, Estonians took advantage of the diversity in ingredients, fusing traditional ideas with new concepts, brought in from countries all over Europe. The existing meat-and-potato based cuisine has been extended to include more uncommon fruits and vegetables and as a result to develop a tradition of food which is far more exciting than was previously available.

Estonia Cake Final 2

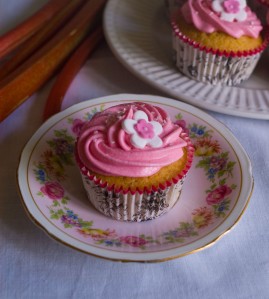
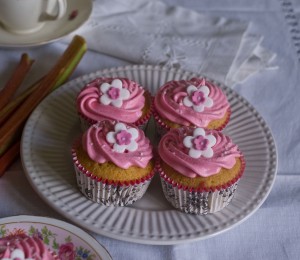
This recipe makes use of rhubarb, the lovely deep pink stems of which are seen in many Estonian gardens. A very popular cake in Estonia contains rhubarb and cardamom, so I combined these two flavours with hint of ginger and a dash of rosewater to create a cake which takes traditional Estonian flavours and brings them forward into a decidedly modern cupcake.

Estonia Cake final 1

Rhubarb, Rose and Cardamon Cupcakes

Ingredients:

  • 4 eggs
  • 8oz caster sugar
  • 8oz butter
  • 8oz plain flour
  • 3 tsp baking powder
  • 1 tsp vanilla essence
  • 25 cardamon pods, seeds removed OR 1 ts ground cardamon
  • 1/2 tsp ginger
  • 8 sticks of rhubarb
  • 2 tbsp caster sugar
  • 10ml cup water
  • 1 tsp rosewater
  • 80g butter
  • 250g icing sugar
  • 2 drops red food colouring
  • decorations of your choice

Instructions:

Preheat the oven to gas mark 5, and line 2 12-hole bun tins with bun cases. Set aside for later.

Cream together the butter and sugar, before beating in the eggs. Add the flour, baking powder, vanilla, cardamon and ginger and mix thoroughly. Spoon into the bun cases and bake in the oven for 25-30 minutes, until and inserted toothpick comes out clean. Remove and leave to cool.

While the cupcakes are cooling, make the  rhubarb filling. Cutthe sticks of rhubarb into small pieces and place in a small pan with the water and sugar. Cook on a medium heat until the rhubarb is falling apart and the mixture is thick, gloopy and sticky. Remove from the heat and strain 4 tablespoons of the mixture through a sieve to produce a pink syrup. Set this syrup aside for later. Leave the remainder of the compote to cool completely

Use a cupcake corer or a small knife to remove a small section from the middle of each cupcake. Fill this hole with the rhubarb compote made earlier. Set aside. Make the buttercream by beating the butter, icing sugar, rosewater and the rhubarb syrup until the mixture is thick and fluffy (about 5 minutes) Add a few drops of red food colouring to create a pink icing. Spoon this in the piping bag with a large star nozzle and pipe onto the top of the cupcake. Decorate with sugarpaste flowers or other decorations of your choice.