Baking · Cake · Cupcakes · Europe · Nation Cake Challenge

The Netherlands: Caramel Apple Waffle Cake

Netherlands flag outline

When I was younger, my father usd to go to the Fotokina trade shows in Amsterdam every year, and when he returned he would invariably have brought us back stroopwafels, the iconic caramel waffle biscuits flavoured with cinnamon. Whilst relatively commonplace in England today, back then they were a novelty, and we used to excitedly anticipate his return with these lovely little biscuits. This following cake takes inspiration from these treats, and combines them with sticky caramel apples (to allow you to feel slightly more virtuous!)

The cake is made in a waffle maker, which makes this cake very quick to make in comparisons to many others. These are layered with caramel apples and a salted caramel cream.

Caramel Apple Waffle Cake

Ingredients:

Cake Waffles

  • 4oz plain flour
  • 4oz caster sugar
  • 4oz butter
  • 1.5 tsp baking powder
  • 1 tsp vanilla essence
  • 2 eggs

Caramel Apples:

  • 2oz butter
  • 4 tbsp caster sugar
  • 4 dessert apples

Salted Caramel Creme Filling (taken from here):

  • 1 cup butter
  • 2 cups of icing sugar
  • 1/4 tsp salt
  • 1/4 cup of caramel

To make the cake waffles, beat together the butter and sugar until light and fluffy. Add the vanilla essence and eggs and mix thoroughly before sifting in the flour and baking powder. Beat the mixture until a smooth batter is formed –  add a tablespoon of water if the btter is too thick. Preheat your waffle maker and make the waffles following the instructions specific to your model. As a general guide the waffles will likely take about 2-3 minutes. Set aside to cool whilst you make the other components of the cake.

To make the caramel creme filling first beat the butter until light and fluffy. Add the sugar and salt and cream together before adding the caramel. Combine the mixture and keep cool until needed.

Make the caramel apples by peeling and coring the apples before cutting them into segments. Melt the butter in a pan before adding the apples and caster sugar. Cook or about 10 minutes, tuning occasionally until the apples are caramelised.

Assemble the cakes by spreading a waffle with the caramel cream and adding a layer of caramel apples. Spread a second waffle with the caramel cream and decorate with apple slices before placing on the top to complete the cake.

Cake · Europe · Nation Cake Challenge

Austria: Sachertorte

Flag of Austria

The choice of cake for Austria was very simple: the Sachertorte. One of the most famous Viennese delicacies, no description of Austrian cakes would be complete without mention of this fantastic gateaux.

The story goes that the cake was invented in 1832, then Prinz Wenzel von Metternich asked his head chef to create a magnificent dessert, suitable for serving to many distinguished guests who he would be entertaining that evening. However, due to illness the task actually fell to his 16 year-old apprentice, Franz Sacher. The prince was delighted with the result, reportedly claiming ‘Let there be no shame on me tonight!’ The dessert was the source of much controversy over the correct construction of the cake in the early 20th century, resulting in the Hotel Sacher being granted the rights to use the name ‘The Original Sachertorte’ for their cake.

The recipe below is the original recipe for Sachertorte, taken from the book Viennese Cooking’

Sachertorte

Ingredients:

Cake:

  • 3/4 cup (170 g) butter
  • 6 1/2 oz. (180 g) semi-sweet chocolate
  • 3/4 cup (170 g) sugar
  • 8 egg yolks
  • 1 cup (120 g) flour
  • 10 egg whites, stiffly beaten
  • 2 tbls. apricot jam

Icing:

  • 1 cup (225 g) sugar
  • 1/3 cup (80 ml) water
  • 7 oz. (200 g) semi-sweet chocolate

Instructions:

Preheat the oven to 275°F(140°C) oven. Grease and line a 8″ cake tin.

Beat the butter until cream and smooth. Melt the chocolate and add to the butter. Add the sugar and stir well. Add the eg yolks one at a time, beating well after each addition. Add the flour and mix gently before folding in the egg whites. Pour the mixture into the pre-prepared tin and bake for about an hour. Remove from the oven and leave to cool.

Slice the cake into two layers. Heat up the apricot jam and spread over the bottom layer, before placing the second layer on top. To make the chocolate icing, heat the sugar and water until it forms thin threads when a spoon is lifted from the pan. Melt the chocolate using a bain-marie, and gradually add the sugar mixture into the melted chocolate. Stir constantly until the mixture coats the back of a spoon. Pour on top of the cake, ensuring a smooth finish on both the sides and the top. Serve in small slices with unsweetened whipped cream.

Cake · Europe · Nation Cake Challenge

France: Apple Tarte Tatin Cake

Flag of France

France is known throughout the world for its patisserie, with some of the most famous desserts originating from this culture. Macarons, gateaux, eclairs – the list goes on. As a consequence I was really spoilt for choice when designing this cake. I settled on tarte tatin eventually though an artistic point rather than an edible one – I loved the idea of trying to create the decoration out of he top of the cake itself, rather than covering it with other things, as is so often the case.

This cake is a variation on an upside-down cake, a design of cake which is seen as ‘retro’ these days. The bottom of the cake tin is covered with caramel, and the apples are arranged in a flower pattern on the top of this. the cake mix is then placed on top of this and the whole cake is then baked in the oven. A second cake contains a layer of pastry cooked on top of the cake, much like a Bakewell tart. The two cakes are then sandwiched together with caramel creme patisserie, and the finished cake is decorated with sugar decorations.

This cake involves a significant amount of work with hot sugar and caramel so care must be taken. You must not use a springform tin to make the cake as the hot caramel may leak through the joins, causing danger of burns. For your safety, ensure that you use a solid, well greased tin and that you use oven gloves and great care!

Ingredients:

Cake:

  • 225g (8oz) salted butter
  • 225g (8oz) golden caster sugar
  • 225g (8oz) self-raising flour
  • 1/2 tsp bicarbonate of soda
  • 4 eggs
  • 60ml (4 tbsp) whole milk
  • 1/2 tsp vanilla extract

Toffee apple topping:

  • Butter (for greasing)
  • 200g (7oz) caster sugar
  • 3 large Grany Smith apples, peeled, cored and sliced into 1cm slices
  • Zest of one large orange

Pastry Disc:

  • 250g plain flour
  • 50g icing sugar
  • 125g butter, cut into small cubes
  • Zest of one orange
  • 1 large egg, beaten
  • 1 splash of milk

Caramel Crème Patisserie:

  • 6oz sugar
  • ¼ cup water
  • 2 cups milk
  • 1 ¼ ounce cornstarch
  • 1 large egg
  • 2 large egg yolks
  • ½ ounce unsalted butter
  • 1 teaspoon vanilla extract

Salted Caramel Shards

  • 1 cup caster sugar
  • 1/8 cup water
  • 2 pinches sea salt

Instructions:

Preheat the oven to 180˚C/350˚F/Gas Mark 4. Grease and line a 9 inch baking tin and set aside.

Heat the sugar and 3 tbsp water in a pan over a high heat until the sugar has dissolved and turned a rich golden brown colour. Do not stir this at any point, as the sugar will crystallise. Remove from the heat and pour into the lined baking tin, ensuring that the base is completely covered. Arrange the apple wedges on the top and cover with a third of the orange zest.

Make the cake by beating the butter, sugar and the rest of the orange zest until fluffy and pale yellow in colour. Mix in the eggs on at a time, before sifting in the flour and bicarbonate of soda. Add the milk and vanilla extract and stir well to combine.

Pour the mixture into the cake tin and bake for 40-50 minutes until an inserted skewer comes out clean. Place a cooling rack over the top of the tin and invert, being careful to avoid any caramel that may fall out. Remove from the tin and set aside to cool completely

To make the pastry disc, sieve the flour and icing sugar into a bowl. Using your fingers, work the cubes of butter into the mixture until it resembles fine breadcrumbs. Mix in the orange zest. Add the eggs and milk, and mix to form a soft dough. Lightly flour this dough.

Pat the mixture into a thick disc and flour it. Wrap it in cling film and refrigerate for 30 minutes.

Roll out the dough on a floured surface to approximately 5mm thick. Cut the dough to the same size as the cake, and place in the cake tin to ensure an accurate base. Prick all over with a fork and add baking beans to the case to ensure that the pastry does not rise up. Bake in the oven at 180˚C/Gas Mark 4 for about 15-20 minutes, checking constantly to ensure it doesn’t burn.

Remove from the oven and leave to cool for 10 minutes. Remove the pastry circle from the tin and leave to cool on a baking rack.

Combine 5 ounces of the sugar and the water in a small, heavy saucepan. Bring to a boil, brush down the sides of the pan with water, and boil for 8 to 10 minutes, or until caramelized. The sugar will be fragrant and a deep amber color when it is caramelized. Remove the pan from the heat and dip the bottom into an ice water bath for a second or two. Slowly stir in the milk. Return the pan to low heat and stir until smooth. Increase the heat to medium and heat to a simmer.

Meanwhile, whisk together the cornstarch and remaining 1 ounce of sugar in a medium bowl. Whisk in the egg and yolks. Continue whisking while adding the hot caramel mixture in a thin stream. Transfer the mixture back to the saucepan and cook, whisking constantly, over medium heat for 2 to 3 minutes, or until it thickens and just comes to a boil. Immediately strain through a fine mesh sieve into a clean bowl and stir in the butter and vanilla. Press plastic wrap directly onto the surface and refrigerate.

To make the caramel shards, put the water and sugar in a small saucepan and heat up. don’t stir, but swirl the pan occasionally. Allow the sugar to gently caramelise before quickly pouring onto a lined and greased baking sheet. quickly tip the sheet to ensure complete coverage, and sprinkle with sea salt. allow to cool completely before breaking into shards.

Assemble the cake by placing the pastry circle on the serving plate and covering with a layer of caramel crème patisserie. carefully place the cake on top, and decorate with caramel shards.

Baking · Cake

Wedding Cake(s)

As a cake-focused blogger, when you get married the cake is going to be a central aspect of an ceremony. But what happens when you can’t narrow the different types down?

Well, this.

BOB_4594

BOB_4786

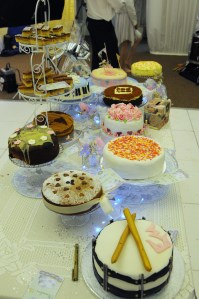
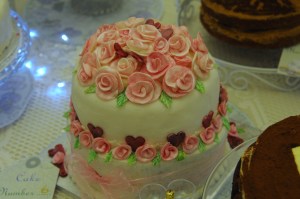
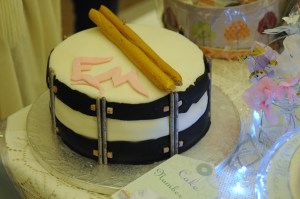
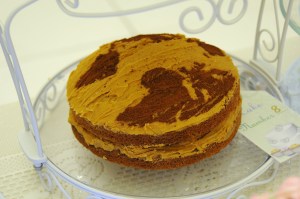
I knew as a slightly fanatical baker, that I wanted cake to be a central feature of my wedding, and so I decided to have a Great British Bake-Off style cake competition. So I suggested the ideas to my guests, and as you can tell they responded fantastically.

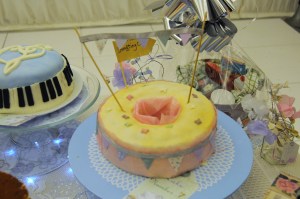
The contestants were asked to bring and decorate  a cake of their choice, with two prize being awarded – one for taste and one for decoration. Here are some of the amazing entries we had!

BOB_4395

Gluten-Free Fruit Cake – Winner of the decoration prize!

BOB_4396

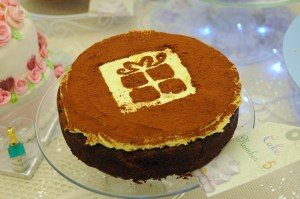
French Chocolate Cake

BOB_4391

Multi-coloured Marble Cake

BOB_4415

Cappuccino Cake

BOB_4394

Guinness Cake

BOB_4393

Victoria Sandwich ‘Bundt-ing’ Cake

BOB_4398

My grandmother’s fruit cake

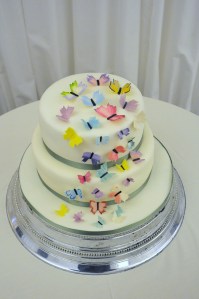
And obviously every wedding needs the official cake (chocolate of course!)

BOB_4515

Baking · Cake · Central America · Nation Cake Challenge

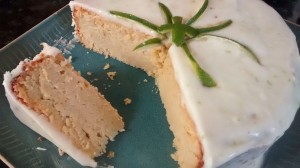
Mexico: Ricotta, Lime and Vanilla Cake

This delicious cake was taken from the book Wahaca: Mexican Food at Home by the brilliant Thomasina Miers.  One of my favourite restaurants to eat at when in London, she focuses on fresh and simple Mexican street food. This recipe traditionally would use a curd cheese called requeson, however Miers suggests ricotta as a good equivalent. The cake is moist and dense, but surprisingly light and fresh – definitely one to make again!

Ricotta cake 2

Ricotta Cake 1

Ricotta, Lime and Vanilla Cake

Ingredients:

  • 225g unsalted butter
  • 300g ground almonds
  • 65g plain flour
  • grated zest and and juice of six limes
  • 250g golden caster sugar
  • 2 tbsp vanilla essence
  • 6 eggs, separated
  • 300g ricotta cheese

Icing:

  • 75g ricotta cheese
  • 30g butter
  • 200g icing sugar
  • 1 tsp grated lime zest

Preheat the oven to Gas Mark 2 (300°F/150°C) and grease a 24in springform tin ready for use later. Line the base of the tin with greaseproof paper.

Combine the ground almonds, flour and lime zest in a bowl and set aside. Cream the butter and sugar together, before beating in the vanilla essence. Mix in the egg yolks one at a time before stirring in the flour mixture. In a different bowl, combine the ricotta and lime juice, before adding to the cake mix and combining well.

Whisk the egg whites until they form stiff peaks and then start to fold into the mixture. Use a spoonful to loosen the mixture before folding in the rest, being careful to not take out too much of the air. Place in the cake tin and bake for an hour, until the cake is just set and slightly golden brown. Let the cake cool for 10 minutes and then turn out onto a wire rack to finish cooling.

To make the icing, beat the butter and ricotta together before beating in the icing sugar and lime zest. Beat with a mixer for several minutes until thick and smooth. Smooth over the cake, and decorate with extra lime zest as required.

Baking · Cake · Nation Cake Challenge · North America

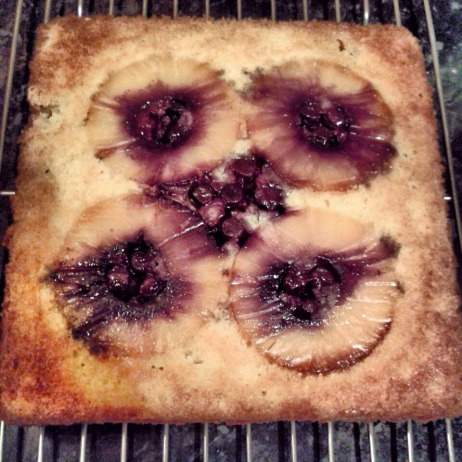
Hawaii: Pineapple, Coconut and Blueberry Upside-Down Cake

As an American state slap-bang in the middle of the Pacific Ocean, Hawaii is a complete contrast to the rest of mainland America (My lack of geographical knowledge in my younger years becomes painfully evident when discussing the Pacific – until I was 11 I thought that Hawaii was somewhere in the Caribbean!). This tropical paradise (Paradise incidently being one of the archepeligo’s nicknames) enjoys ideal conditions for people from sun-seeking tourists to thrill-seeking surfers and volcanologists. Sadly it has one major issue, in that it is about as far as Britain as possible, therefore making a holiday rather impractical.

I plan to visit Hawaii at some point during my life, and at present the dreams of this island make the grey British January weather rather more bearable. When I walk down the cold, dark roads, I picture myself in Hawaii, eating pineapples (the island’s biggest crop), swimming in the warm sea and generally getting the sun I can’t seem to find at the moment!

pineapple upside down cake

The main aspect of this delicious cake, the pineapple is a major export of Hawaii. Whilst it originated in South America, it was introduced to the islands in the early 1990’s, quickly gaining massive popularity. The two largest pineapple companies (Dole and Del Monte) first started their companies on Oahu (the largest albums) and Hawaiian pineapple is still a massive corner of the market to this day. Combined in this delectable cake is the intensely tropical coconut and some added rum and blueberries to give some extra colour and intensity. Eat this cake and you will forever forget the pineapple upside down cakes of yesteryear.

The recipe was taken from  London Bakes (here)

Pineapple, Coconut and Blueberry Upside-Down Cake

Ingredients:

  • 500g fresh pineapple (canned will do at a push, but fresh is so much better!)
  • 20g fresh blueberries
  • 50g unsalted butter
  • 2 tbsp caster sugar
  • 100ml coconut milk
  • 50g dessicated coconut
  • 1 tsp vanilla extract
  • 30ml rum
  • 165g unsalted butter, softened plus more for the tin
  • 200g caster sugar
  • 2 eggs
  • 185g plain flour
  • 1 1/2 tsp baking powder

Instructions:

Preheat the oven to 175F.  Line a tin with parchment paper and grease well with butter. Don’t use a springform tin unless you want to spill hot syrup all over yourself…

In a saucepan, heat the coconut milk until boiling, before taking off the heat and stir in the dessicated coconut, vanilla and rum.  Leave to cool whilst you prepare the pineapple.

Cut the pineapple into thin slices (if using canned, then just drain the slices slightly).  Melt the butter and sugar in a frying pan and, when hot, add the pineapple slices and caramelize on each side (this will take about 3 minutes on each side). Remove from the heat, allow to cool and place the pineapple in a layer at the bottom of the cake tin.  Pour over the syrup from the pan.  Add the blueberries to the gaps between the pineapple slices.

To make the cake, beat together the butter and sugar until light and fluffy.  Beat in the eggs one at a time until combined and then fold in the flour, baking powder and coconut mixture. Pour into the tin and bake for 25-30 minutes until a toothpick comes out clean and the top is golden brown. Cool in the tin for 15 minutes, then turn out onto a wire rack, carefully peeling off the parchment paper to expose the fruit topping.

Serve with ice cream or cream.

Baking · Cake

The Ultimate Chocolate Cake

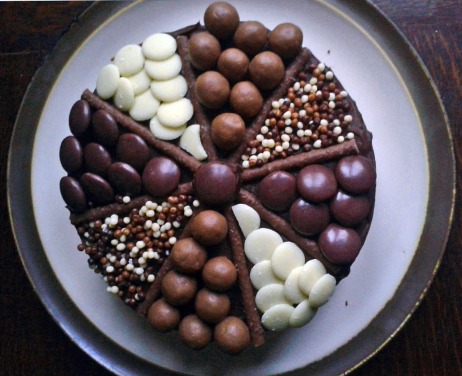
This is what happens in our house when one of us goes ‘I really feel like some chocolate cake.’ I never go by half measure when chocolate is involved and this is no exception.

chocolate cake 1

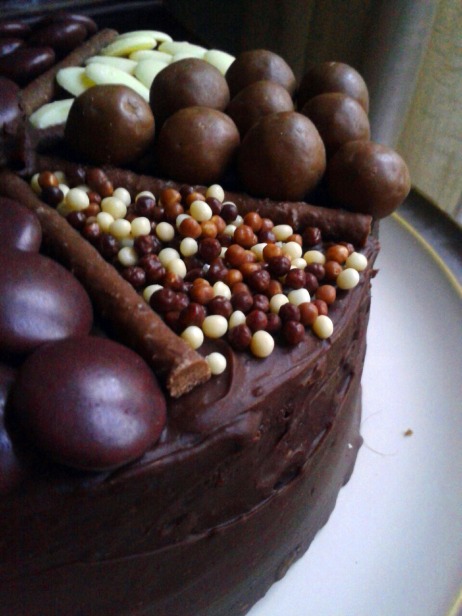
The basis is a chocolate chunk sponge, filled and covered with a  dark chocolate ganache. This is then decorated with a selection of chocolates – in this case matchmakers, minstrels, malteasers and mixed chocolate balls. You can’t go wrong.

chocolate cake 2

The Ultimate Chocolate Cake

Ingredients:

Chocolate Cake:

  • 8oz butter
  • 8oz caster sugar
  • 80z self raising flour
  • 4 eggs
  • 2oz cocoa powder
  • 200g dark chocolate, cut into chunks
  • 1 tsp coffee essence

Chocolate Ganache:

  • 300g dark chocolate, broken into pieces.
  • 300g double cream
  • chocolate decorations, as preferred.

Instructions:

Preheat the oven to Gas mark 5, and line an 8in round cake tin.

Beat together the butter and sugar, before beating in each egg, one at a time. Add the flour, cocoa powder and coffee essence and mix thoroughly. Add the chocolate chunks, and stir through the mixture. Pour the mixture into the cake tin and bake for 1 hour, until an inserted cocktail stick comes out clean. Remove from the tin and leave to cool.

Whilst the cake is cooling, heat the cream in a pan until almost boiling. Pour over the chocolate chunks and stir until melted. Leave to cool, which will also allow the mixture to thicken.

Using a large serrated knife, cut the cake in half horizontally, and sandwich with  the chocolate ganache. Spread the rest of the ganache on the top and sides of the cake, and decorate with the chocolates and sweets of your choice. Chill in the fridge for 30 minutes and serve with cream or ice cream.

Baking · Cake

Pear and Pecan Cake (or ‘How I Nearly Killed a Wooden Spoon with a Food Processor)

Good afternoon blogging world. Long time no see.

The reason for this lack of contact is one I’m sure that many foodies face at some point – nothing I’ve tried out really worked. Apart from the very boring chocolate vanilla cupcakes I made for my string group, the other cake (a coffee-turkish delight combination which I’ll be posting about later) had some very mixed results. Whilst the school students loved them (and ate them all in about 10 seconds flat!), Max was not so impressed and said that they tasted savoury… not a good comment for a a sweet cupcake! Back to the drawing board with them.

Parsnip cake

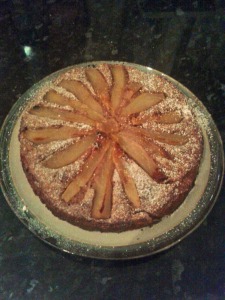
Instead I present this cake, which met with very favourable results. I will say now that this recipe is completely someone else’s invention, coming from the wonderful cookbook Red Velvet and Chocolate Heartache by Harry Eastwood. Someone else’s it might be, but it is still very good. The secret ingredient in this cake is parsnip, grated and mixed into the batter in a method similar to that of a carrot cake.

parsnip cake 2

Making this cake also gave me the excuse to finally find out how the grating attachment on my Kenwood mixer works. This led to a slightly difficult moment when I tried to push the parsnip down with a wooden spoon – fine until the spoon hit the grating attachment. I’m sure you can imagine the rest. Poor wooden spoon.

Pear and Pecan Cake

Ingredients:

  • 3 small pears
  • 1/2 lemon
  • 150g pecans
  • 150g white rice flour
  • 2 tsp baking powder
  • 1/4 tsp salt
  • 1 vanilla pod, halved and the seeds removed
  • 2 tsp grated ginger
  • 1 tsp cinnamon
  • 3 medium eggs
  • 180g caster sugar
  • 200g finely grated parsnip
  • 125ml calvados (or if like me this is beyond your local community, cloudy apple juice also works)
  • Icing sugar (to decorate)

Instructions:

Preheat the oven to 200°C/400°F/gas mark 6. Grease and line a 23cm diameter springform tin and set aside.

Peel, core and thinly slice the pears, before sprinkling with lemon juice and setting aside. Grind the pecans in a food processor until very fine, then add the flour, baking powder, salt, vanilla seeds, ground ginger, cinnamon and whizz for another minute until completely combined.

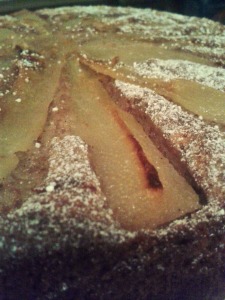
Whisk the eggs and sugar together until thick and tripled in volume, before adding in the grated parsnip and the dry ingredients. Mix completely before adding in the Calvados/apple juice to loosen the mixture. Pour half the mixture into the tin and top with half the sliced pears. Pour the remaining mixture over the top and top with the remainder of the pears, arranging them into a pretty floral pattern. Cover with tin foil and bake in the oven for 2 hours. You have read this right, 2 hours. Take it out of the oven and serve with vanilla ice cream.89

Baking · Cake · Pastry

The Hartlepool Townie

You’ve heard of cronuts, the doughnut-croissant hybrid right? Well, over the last few months it has been toppled from its lofty pastry perch by no less than a British contender! Yes, that’s right, BRITISH! We may have been beaten to the front by the cupcake, the doughnut and the elusive cronut itself, but we won this one!

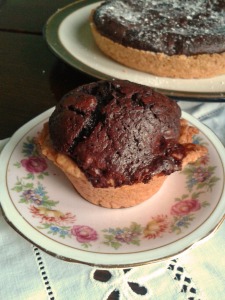
Townie 1

And boy, what a one to win!, Whilst the cronut is like a chinese takeway – something you eat once in a blue moon and which your weight does NOT thank you for later! – the townie is the Italian buffet, the delicious meal that you finish and can’t wait for the next. I can’t promise it will make you feel any less fat, but at least it’s not deep fried.

townie 3

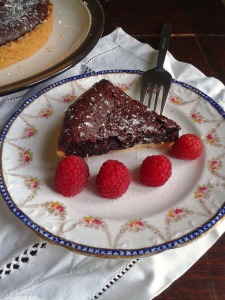
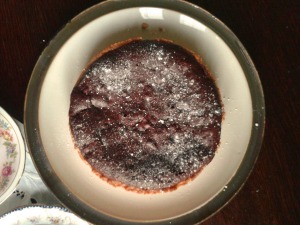
The original townie was made in London by Bea Vo of Bea’s of Bloomsbury, after a request to create as many rival mash-up pastries as possible. However, as with many of these things, the recipe is a closely guarded secret, so I decided to make my own version, by combining my favourite recipes for the various components. The pastry is taken from the queen herself (Delia Smith), whilst the brownies are originally a Jamie Oliver recipe. Whilst made as a large tart, you could also make smaller, muffin-sized versions as per the original – just fill greased muffin tins with a circle of pastry and fill with the brownie mix.

Townie 2

Whilst the basic tart is delicious on its own, I also tried out a version with added toppings – more ideas to follow…

The Hartlepool Townie

Ingredients:

Sweet Pastry:

  • 90g butter
  • 65g caster sugar
  • 3 free range egg yolks
  • 200g plain flour

Brownie:

  • 250g unsalted butter, at room temperature
  • 200g dark chocolate
  • 50g chopped walnuts
  • 80g cocoa powder, sifted
  • 60g self raising flour, sifted
  • 360g caster sugar
  • 4 large eggs
  • zest of 1 orange

Instructions:

First make the pastry by creaming together the butter and sugar together until pale and fluffy. Beat in the egg yolks one at a time until fully combined. Sift the flour into the mixture and stir until the mixture comes together into a ball of dough. Tip the dough onto a floured surface and briefly knead until smooth. Wrap in cling film and chill for at least 30 minutes.

Preheat the oven to gas mark 4. Roll out the pastry on a floured surface to a thickness of about 3mm. Grease and flour a 10in loose-bottomed flan tin. Place the pastry over the top and press into the corners to fill the tin. Fill the tin with baking beans or rice (you may find it easier to place a piece of tinfoil over the pastry first) and bake for 15 minutes.  Remove from the oven and leave to cool for 10 minutes.

Whilst the pastry shell is baking, make the brownie mix. Melt the butter and chocolate over a bain marie (a bowl over a saucepan of simmering water) and stir until smooth. Stir in the nuts. In a separate bowl, stir all the dry ingredients together, before adding to the chocolate mixture, spoonful by spoonful. Finally, mix in the eggs one at the time, beating well until fully combined.

Pour the mixture into the pastry case (having removed the beans/rice first!) and bake in the oven for 25 minutes (still at gas mark 4) until the brownie mixture is cooked. Remember that brownie mixtures will still by squidgy when completely baked, so don’t worry if it’s still sticky! Remove from the oven and leave to cool before slicing into wedges and serving with whipped cream and berries if desired (or if you are me, eating wedge after wedge from the fridge…)

Baking · Cake · Cupcakes

United States of America: S’Mores Cupcakes

Flag of the United States of America

Yay, S’Mores Cupcakes! Now being from England, s’mores are not traditional – whilst I love toasting marshmallows in front of the fire, we English don’t do the whole biscuit/chocolate/marshmallow thing. However, after seeing many recipes in blogs/magazines and the internet and having a full jar of marshmallow fluff in the cupboard, I decided to give this American classic a try. So if you are in the mood for an American girl-guiding experience, try these!

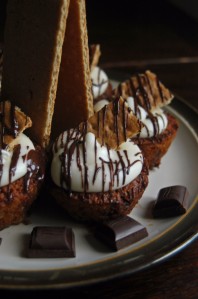
Smores cupcake

The cake is a sponge mix enhanced with Graham crackers and chocolate chips, which is then topped with a marshmallow fluff frosting (which could be torched if you wanted to add a really authentic flavour to the cupcake). This is then decorated with dark chocolate drizzle and more graham crackers. I used honey grahams, which added a lovely depth of flavour, but it would also work well with plain crackers if you are unable to find the flavoured versions.

Marshmallow fluff frosting recipe taken from here

S’Mores Cupcakes

Ingredients:

  • 8oz butter
  • 8oz golden caster sugar
  • 4 eggs
  • 4oz plain flour
  • 4oz graham crackers, ground into powder
  • 3 tsp baking powder
  • 2oz dark chocolate chips
  • 150g butter
  • 300g icing sugar
  • 200g marshmallow fluff
  • 2 tbsp milk

Instructions:

Preheat the oven to gas mark 5, and line a 12-hole cupcake tin with liners. Make the cupcake batter by creaming together the butter and sugar before beating in the eggs. Mix in the flour, ground graham crackers, baking powder and chocolate chips before spooning into the cupcake tin. Bake for 30 minutes until golden brown and well risen. Remove from the oven and leave to cool.

Once the cupcakes have cooled, beat the butter and sugar together using a hand blender until light and fluffy. Add the milk and marshmallow fluff and continue to beat until a good consistency is reached. Spoon into a piping bag and pipe a swirl onto the top of each cupcake. Decorate the cupcake with graham crackers and drizzled dark chocolate.